How to add and manage your payment method

Connect a bank account, MiniPay, Binance, or Cenoa.

Updated June 19, 2026

Before you can collect a single payment on Ruul — that is, before you can get paid — you need a payout account on file. You can connect a Bank Account, a MiniPay Account, a Binance Account, or a Cenoa Account, and this guide walks you through each one.

If you haven’t verified your ID yet, you’ll be asked to do so before adding an account. Once ID verification is complete, you can continue with the steps below.

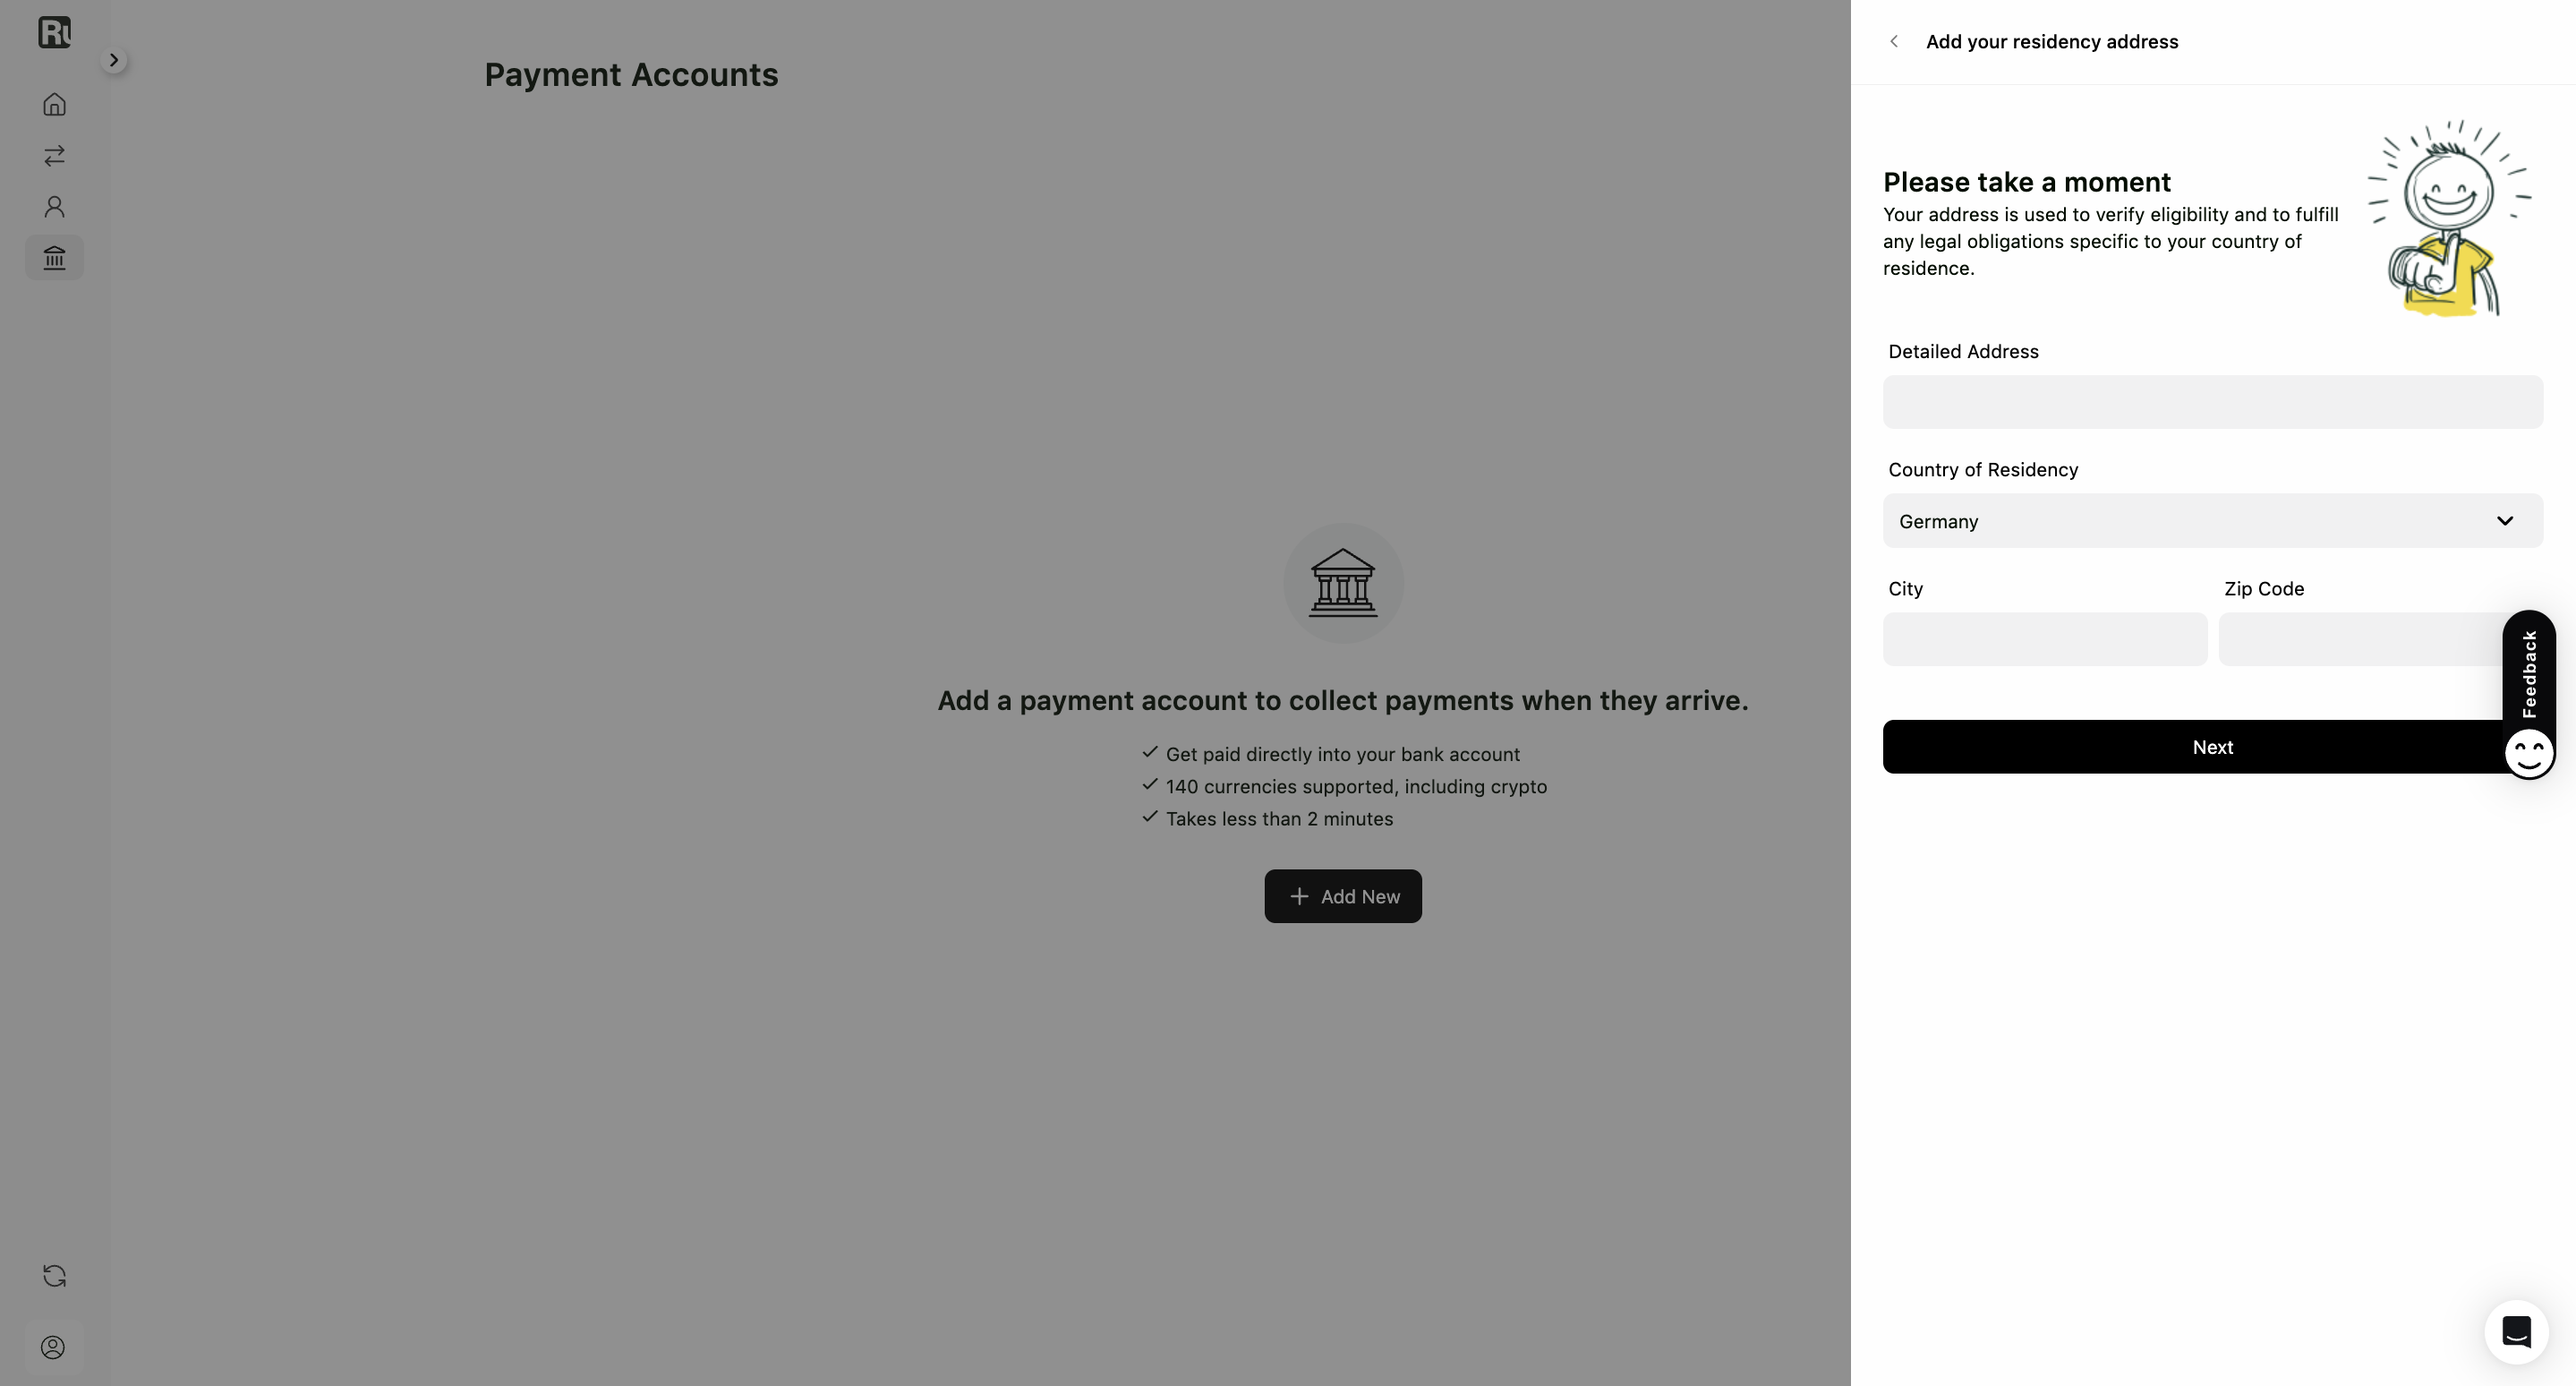
1. Add Your Residency Address

Before you can add a payment account, we need to confirm your residency details.

  1. Enter your detailed address, country of residency, city, and zip code.
  2. Check the box to agree to the Contractor Agreement and Seller Agreement
  3. Click Next.

Image 1

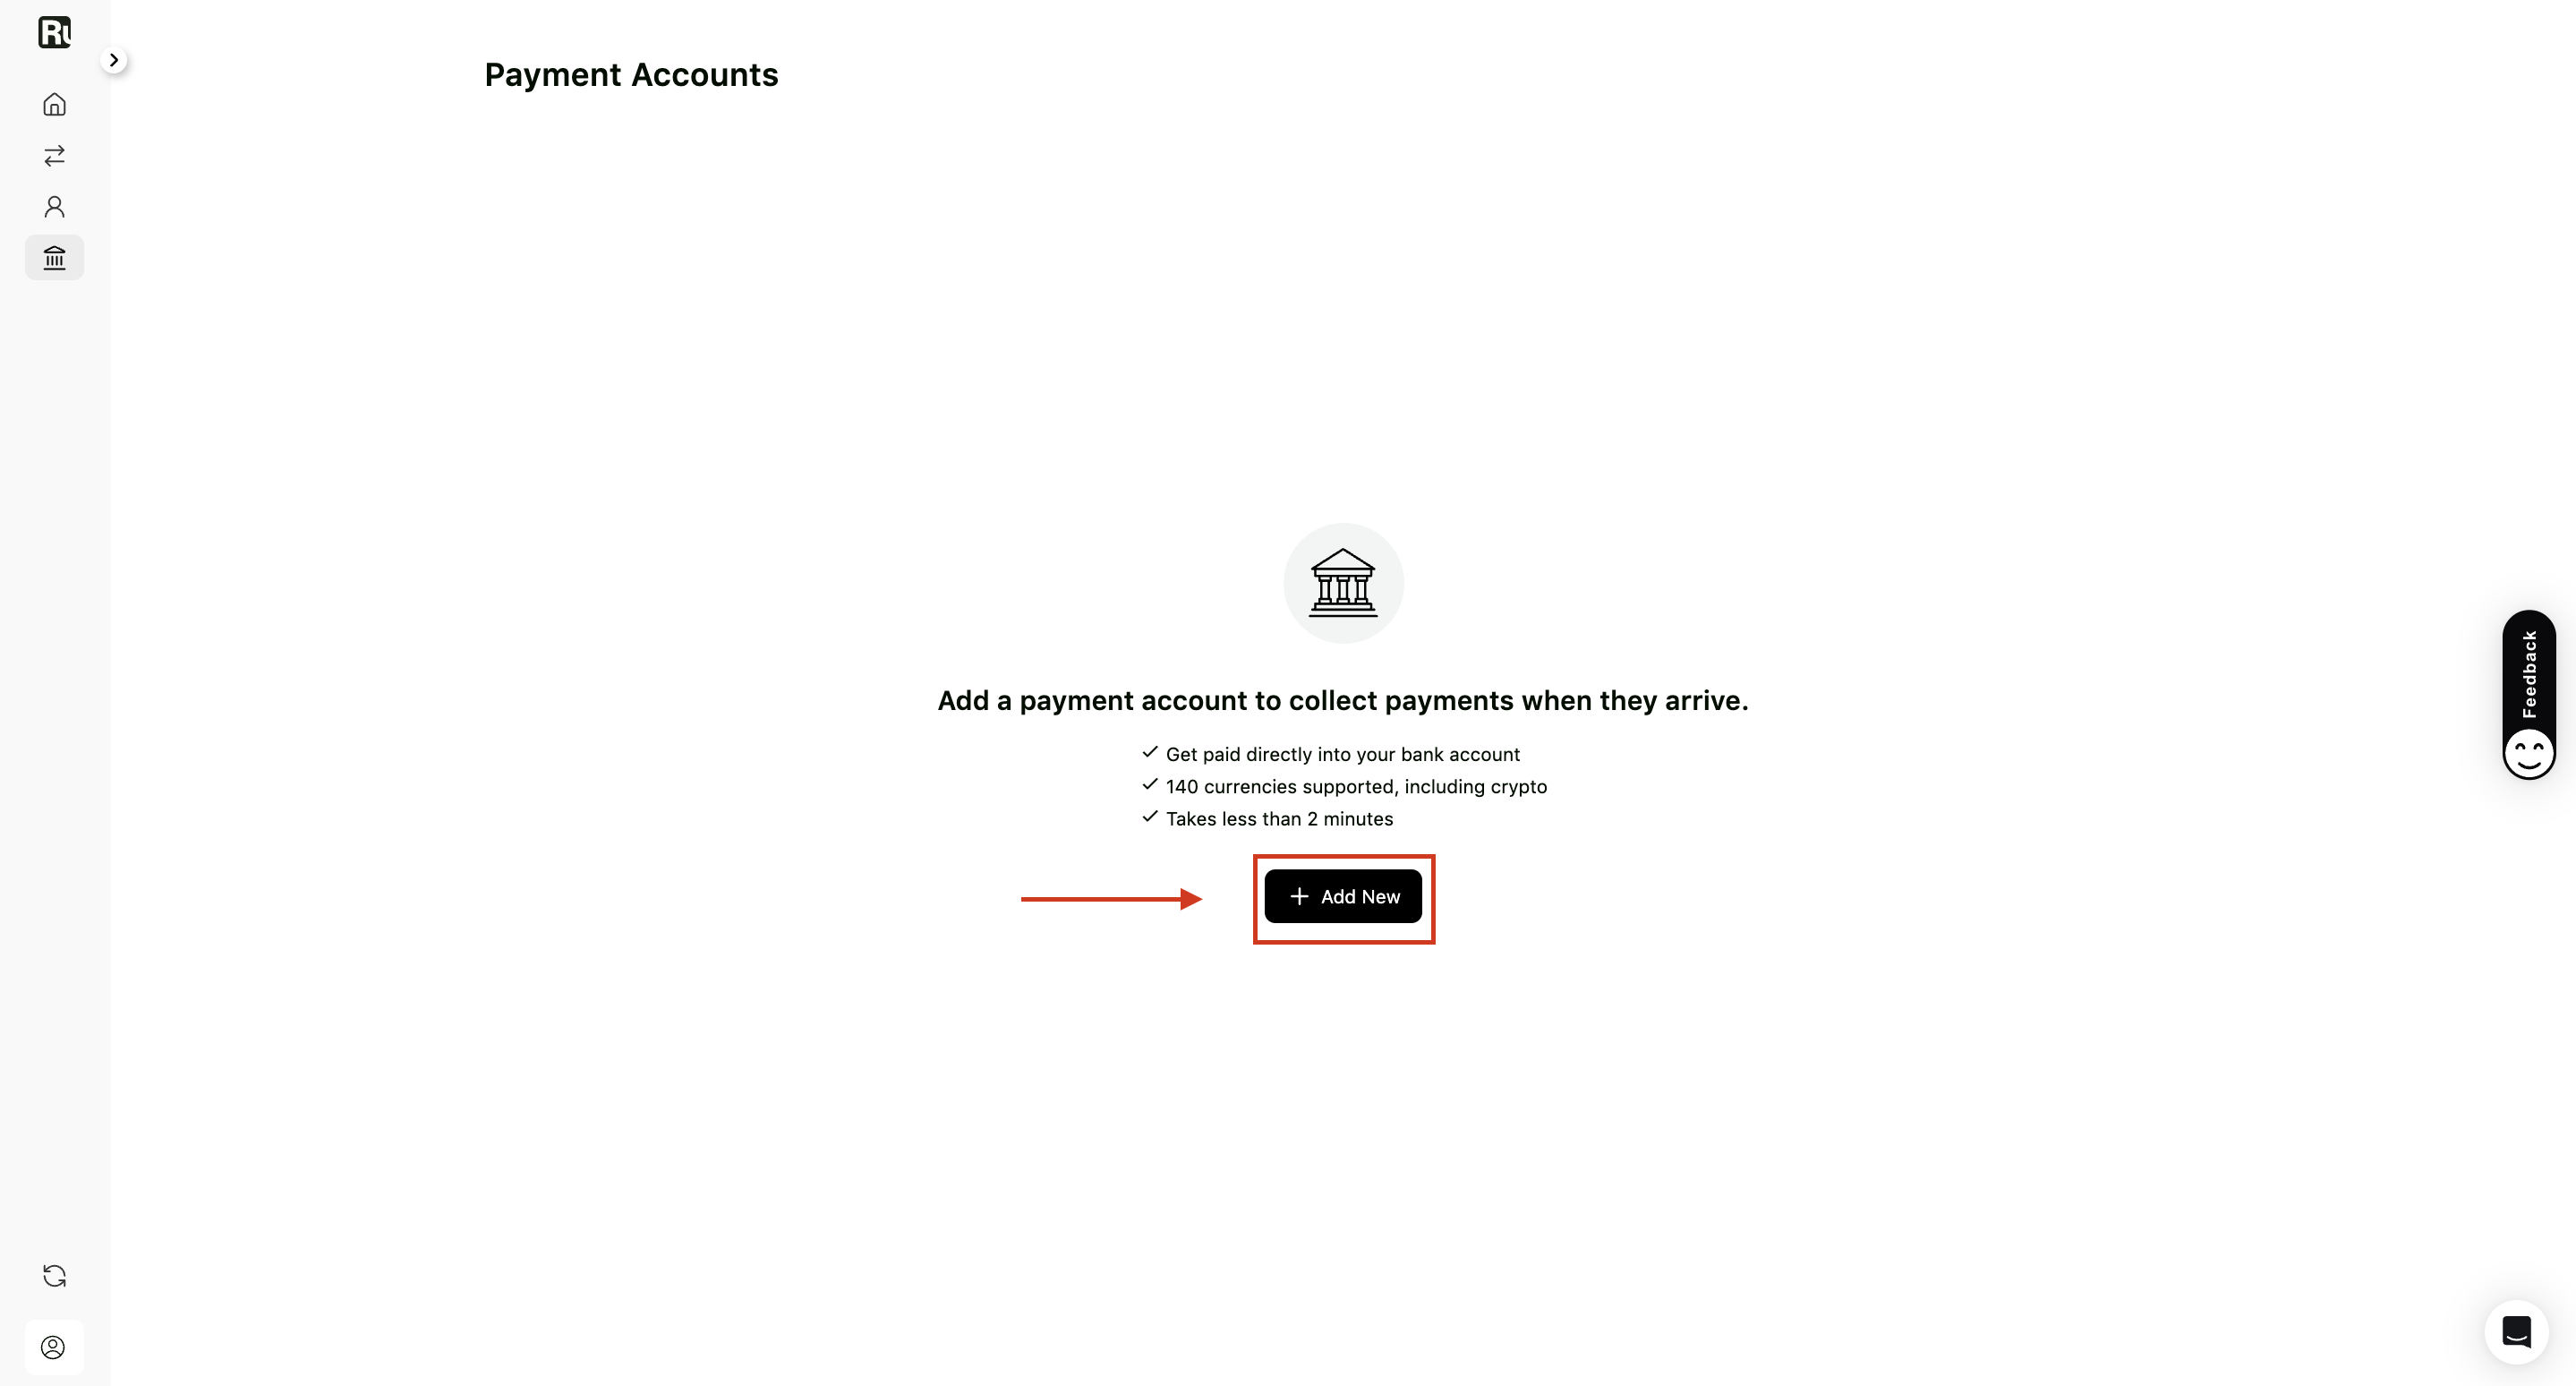
2. Open Payment Accounts

  1. Go to Payment Accounts in the sidebar.
  2. Click Add New.

Image 2

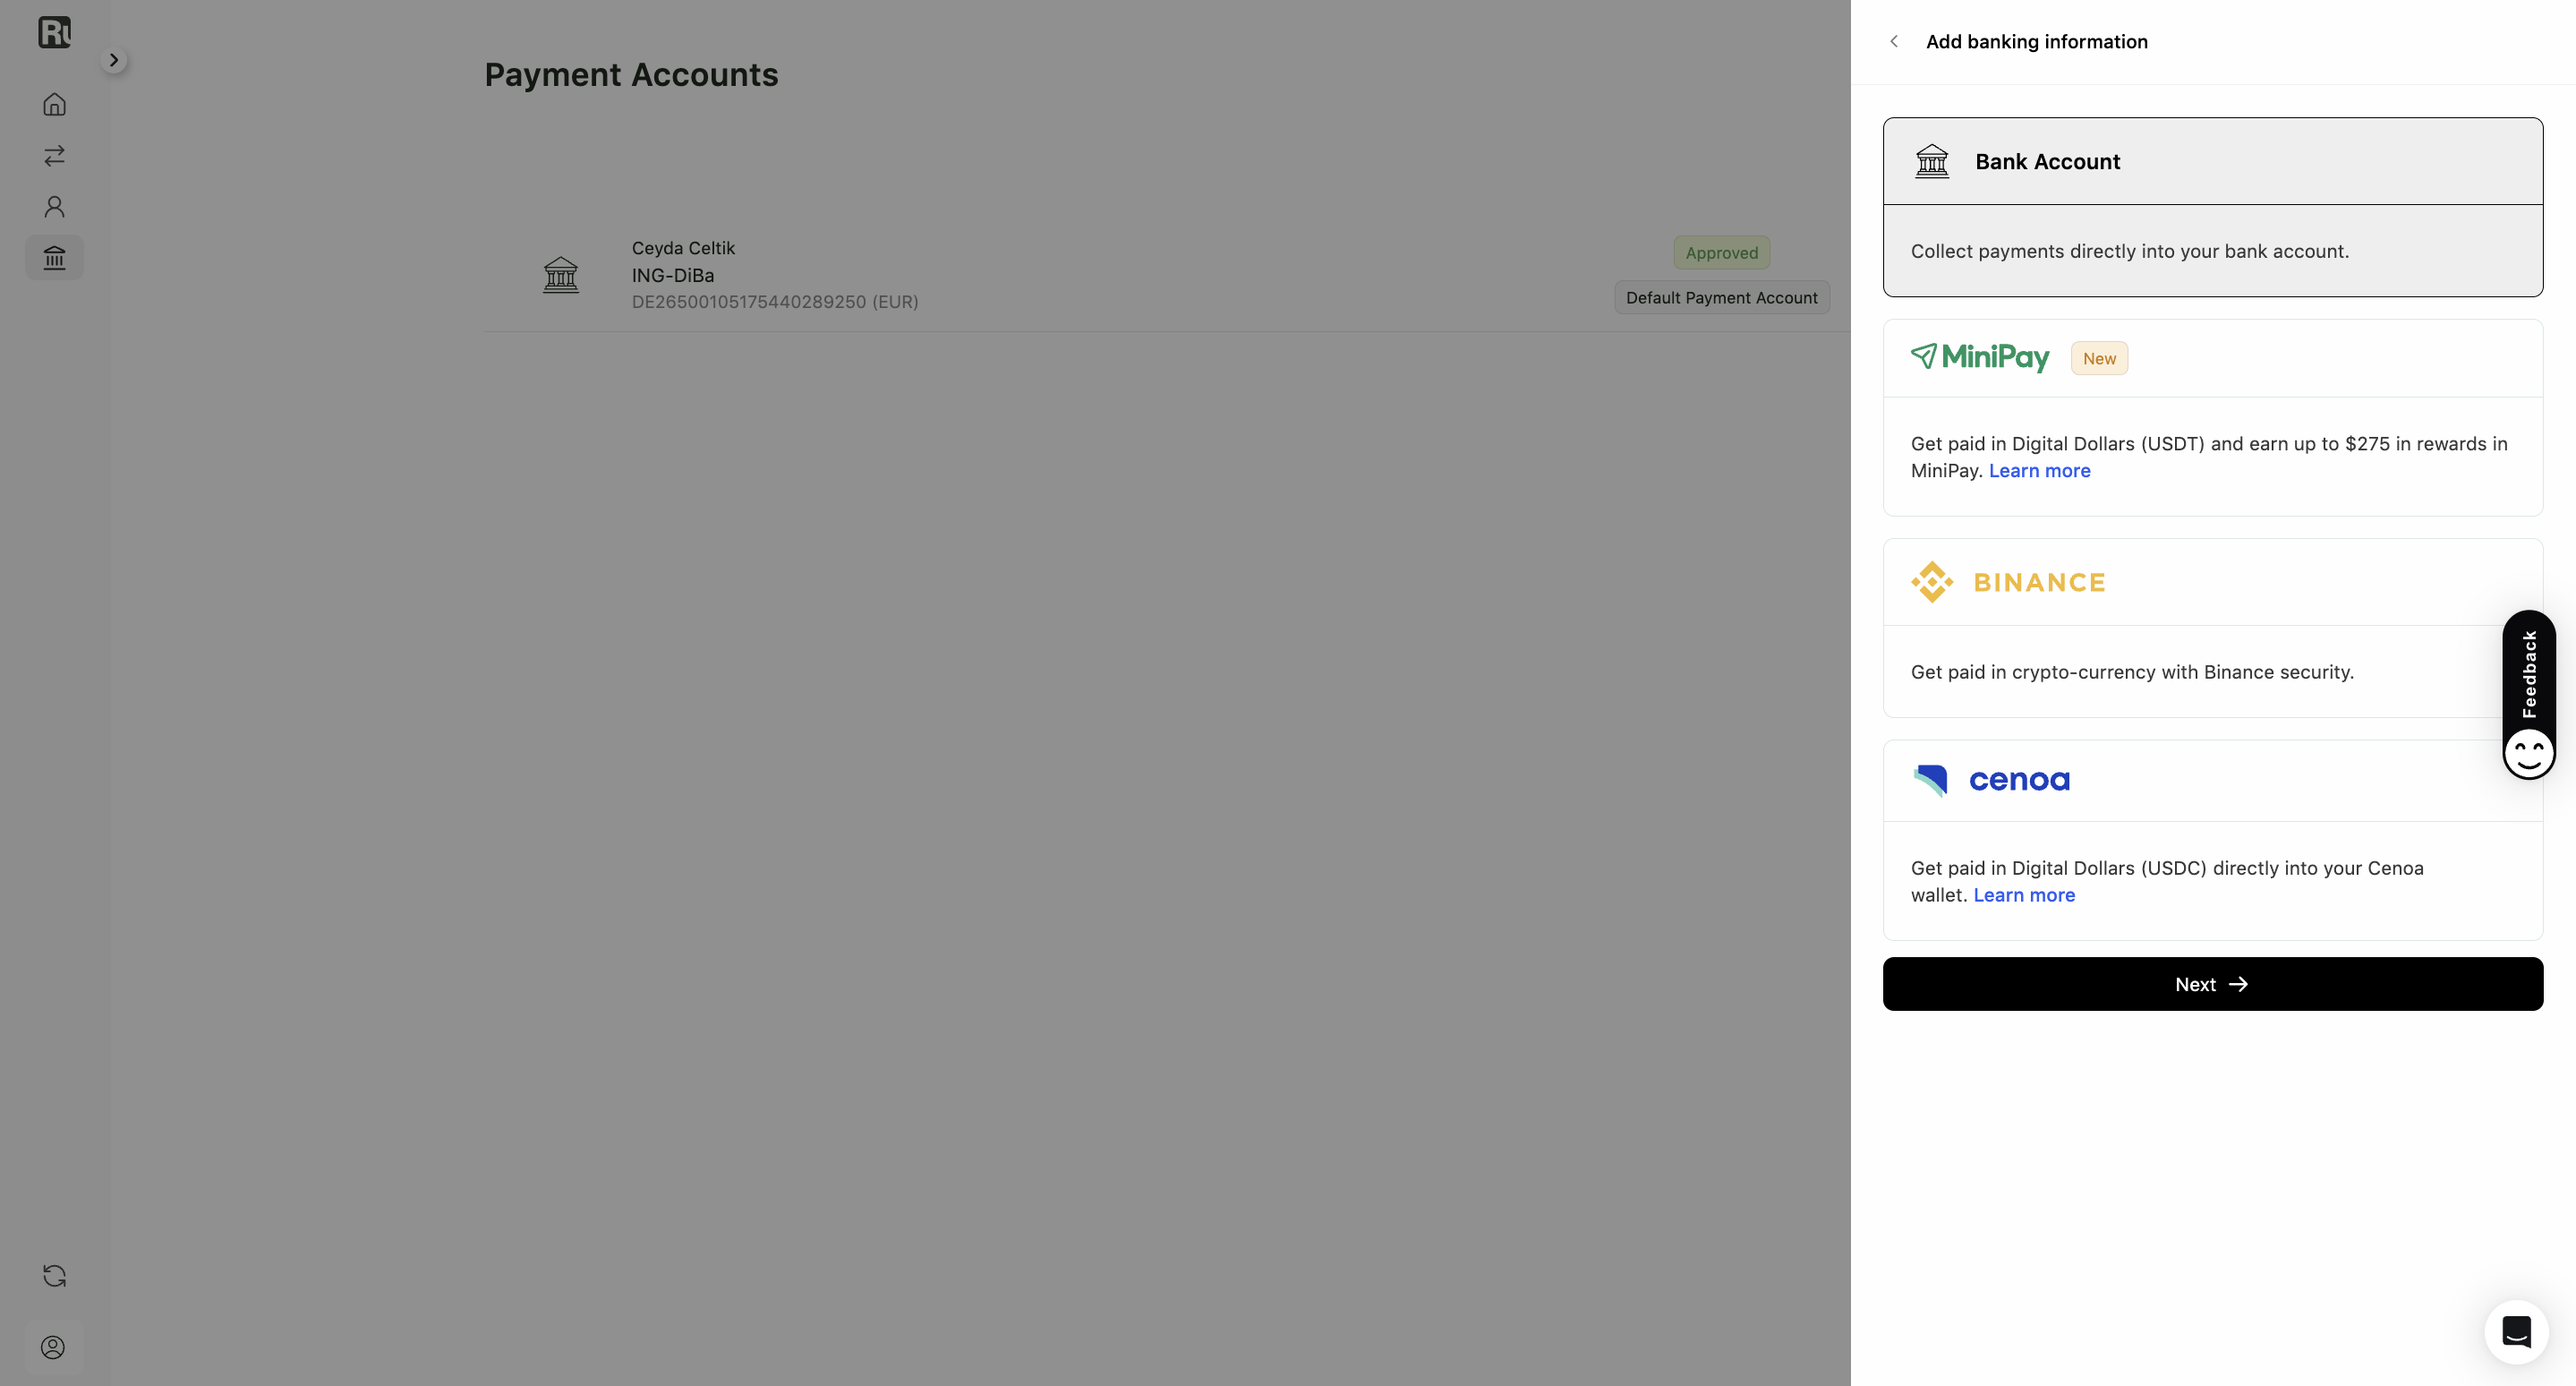
You’ll see the available collection options:

  • Bank Account – receive payouts directly to your bank.
  • MiniPay - get paid in Digital Dollars (USDT) directly into your MiniPay wallet.
  • Binance – get paid in cryptocurrency with Binance security.
  • Cenoa – receive Digital Dollars (USDC) directly into your Cenoa wallet.

Image 3

Adding a Bank Account

1. Select “Bank Account” and click “Next”.

2. Choose the country where your bank account is registered.

Image 4

3. Select the currency of your account.

Image 5

4. If the account is from a country that uses IBAN, you’ll be asked to provide it. Different information may be required depending on the country of the account.

Image 6

  • Bank details (bank name, SWIFT code, account holder name) will be filled automatically.
  • If something looks wrong, click No, edit to correct it.
  • Click Yes, add bank account to confirm.

Image 7

5. Done! 🥳

Your bank account has been added!

Your bank account will appear under Payment Accounts.

Image 8

Adding a MiniPay Account

To collect your payments in Digital Dollars (USDT) with MiniPay, you can add your MiniPay account as a payment collection method.

1. Select “MiniPay” and click “Next”.

Image 9

2. Choose Your MiniPay Setup Option

You’ll see two options:

  • New to MiniPay
  • Already have a MiniPay account

Option A: New to MiniPay

  1. Select New to MiniPay and click Next.

  2. You’ll see:

    • A QR code to download the MiniPay app
    • App Store and Google Play buttons
  3. Download the MiniPay app and complete your registration.

  4. After your registration is complete, return to Ruul to continue.

Option B: Already have a MiniPay account

  1. Select Already have a MiniPay account and click Next.

Image 10

  1. You’ll now see two options:
    • Create your virtual account
    • Add Virtual Bank Account Details (if you already have one)

3. Create Your Virtual Account

If you haven’t created your MiniPay virtual bank account yet:

  1. Under Create your virtual account, you’ll see:
    • A QR code
    • A Create Virtual Account on MiniPay button
    • A link explaining how to create your virtual account

Image 11

  1. Open MiniPay and create your virtual account.
  2. Once completed, return and click Add Virtual Bank Account Details.

Image 12

4. Add Your Virtual Bank Account Details

You’ll be asked to choose the currency of your MiniPay virtual account:

  • EUR
  • USD

Image 13

If you select EUR

  1. Enter your IBAN.

Image 14

  1. Click Check IBAN.
  2. A confirmation screen will appear showing:
    • Country
    • Currency
    • First name
    • Last name
    • IBAN

Image 15

  1. Click:
    • No, edit to fix information
    • Yes, add bank account to complete setup

If you select USD

  1. Enter:
    • First Name
    • Last Name
    • Account Number

Image 16

  1. Click Add Bank Account.

5. Done! 🎉

Your MiniPay account will now appear under Payment Accounts and is ready to receive payouts in Digital Dollars (USDT).

Image 17

Adding a Binance Account

1. Select Binance and click Next.

Image 18

⚠️ Note: Currently, crypto payouts are only available for Invoices.

2. You can either connect an existing Binance account or create a new one.

  • If you don’t already have a Binance account, select Create a new account and click Next. You’ll be redirected to Binance to register.

Image 19

Image 20

  • If you already have a Binance account, select Connect your existing account, read the Terms of Use, and click Next. Terms of Use

“I acknowledge and agree that by choosing cryptocurrency as my payout method, I am solely responsible for declaring any income generated through cryptocurrency transactions. I understand that I must comply with all relevant local regulations and tax laws pertaining to cryptocurrency assets in my jurisdiction. Ruul OÜ assumes no responsibility for any legal or tax obligations arising from my use of cryptocurrency payouts.”

Image 21

Image 22

Once your Binance account is successfully connected, it will appear under Payment Accounts and will be ready to receive crypto payouts.

Adding a Cenoa Account

1. Select “Cenoa” and click “Next”

Image 23

⚠️ Note: Currently, crypto payouts are only available for Invoices.

2. You can either connect an existing Cenoa account or create a new one.

  • If you don’t already have a Cenoa account, select Create a new account and click Next.

Image 24

A QR code will be shown scan it to download the Cenoa app from the App Store or Google Play.

Complete your registration on the Cenoa app.

Image 25

  • If you already have a Cenoa account, select Connect your existing account, read the Terms of Use, and click Next. Terms of Use

“I acknowledge and agree that by choosing cryptocurrency as my payout method, I am solely responsible for declaring any income generated through cryptocurrency transactions. I understand that I must comply with all relevant local regulations and tax laws pertaining to cryptocurrency assets in my jurisdiction. Ruul OÜ assumes no responsibility for any legal or tax obligations arising from my use of cryptocurrency payouts.”

Image 26

Enter the phone number linked to your Cenoa account and click Send Verification Code.

Enter the one-time passcode (OTP) received via SMS.

Click Connect Cenoa account.

Image 27

Once verified, your Cenoa account will appear under Payment Accounts and will be ready to use.

That’s it! After adding a payment collection account, you’re ready to receive payments!

Frequently asked questions

Do I need to verify my ID before adding a payout account?

Yes. If you haven't completed identity verification yet, Ruul will prompt you to do so before you can add a payment account.

Which payout methods can I connect?

You can connect a bank account, a MiniPay wallet (Digital Dollars/USDT), a Binance account (crypto), or a Cenoa wallet (Digital Dollars/USDC).

Can I add more than one payout account?

Yes. You can add multiple accounts and they all appear under Payment Accounts, so you can choose which one to use.

Was this article helpful?