

A one-time invoice is how you request a single payment from a client - the everyday way to invoice clients on Ruul. You set the details, preview the full total (fees and VAT included), and send it in a handful of steps.
Entry Points
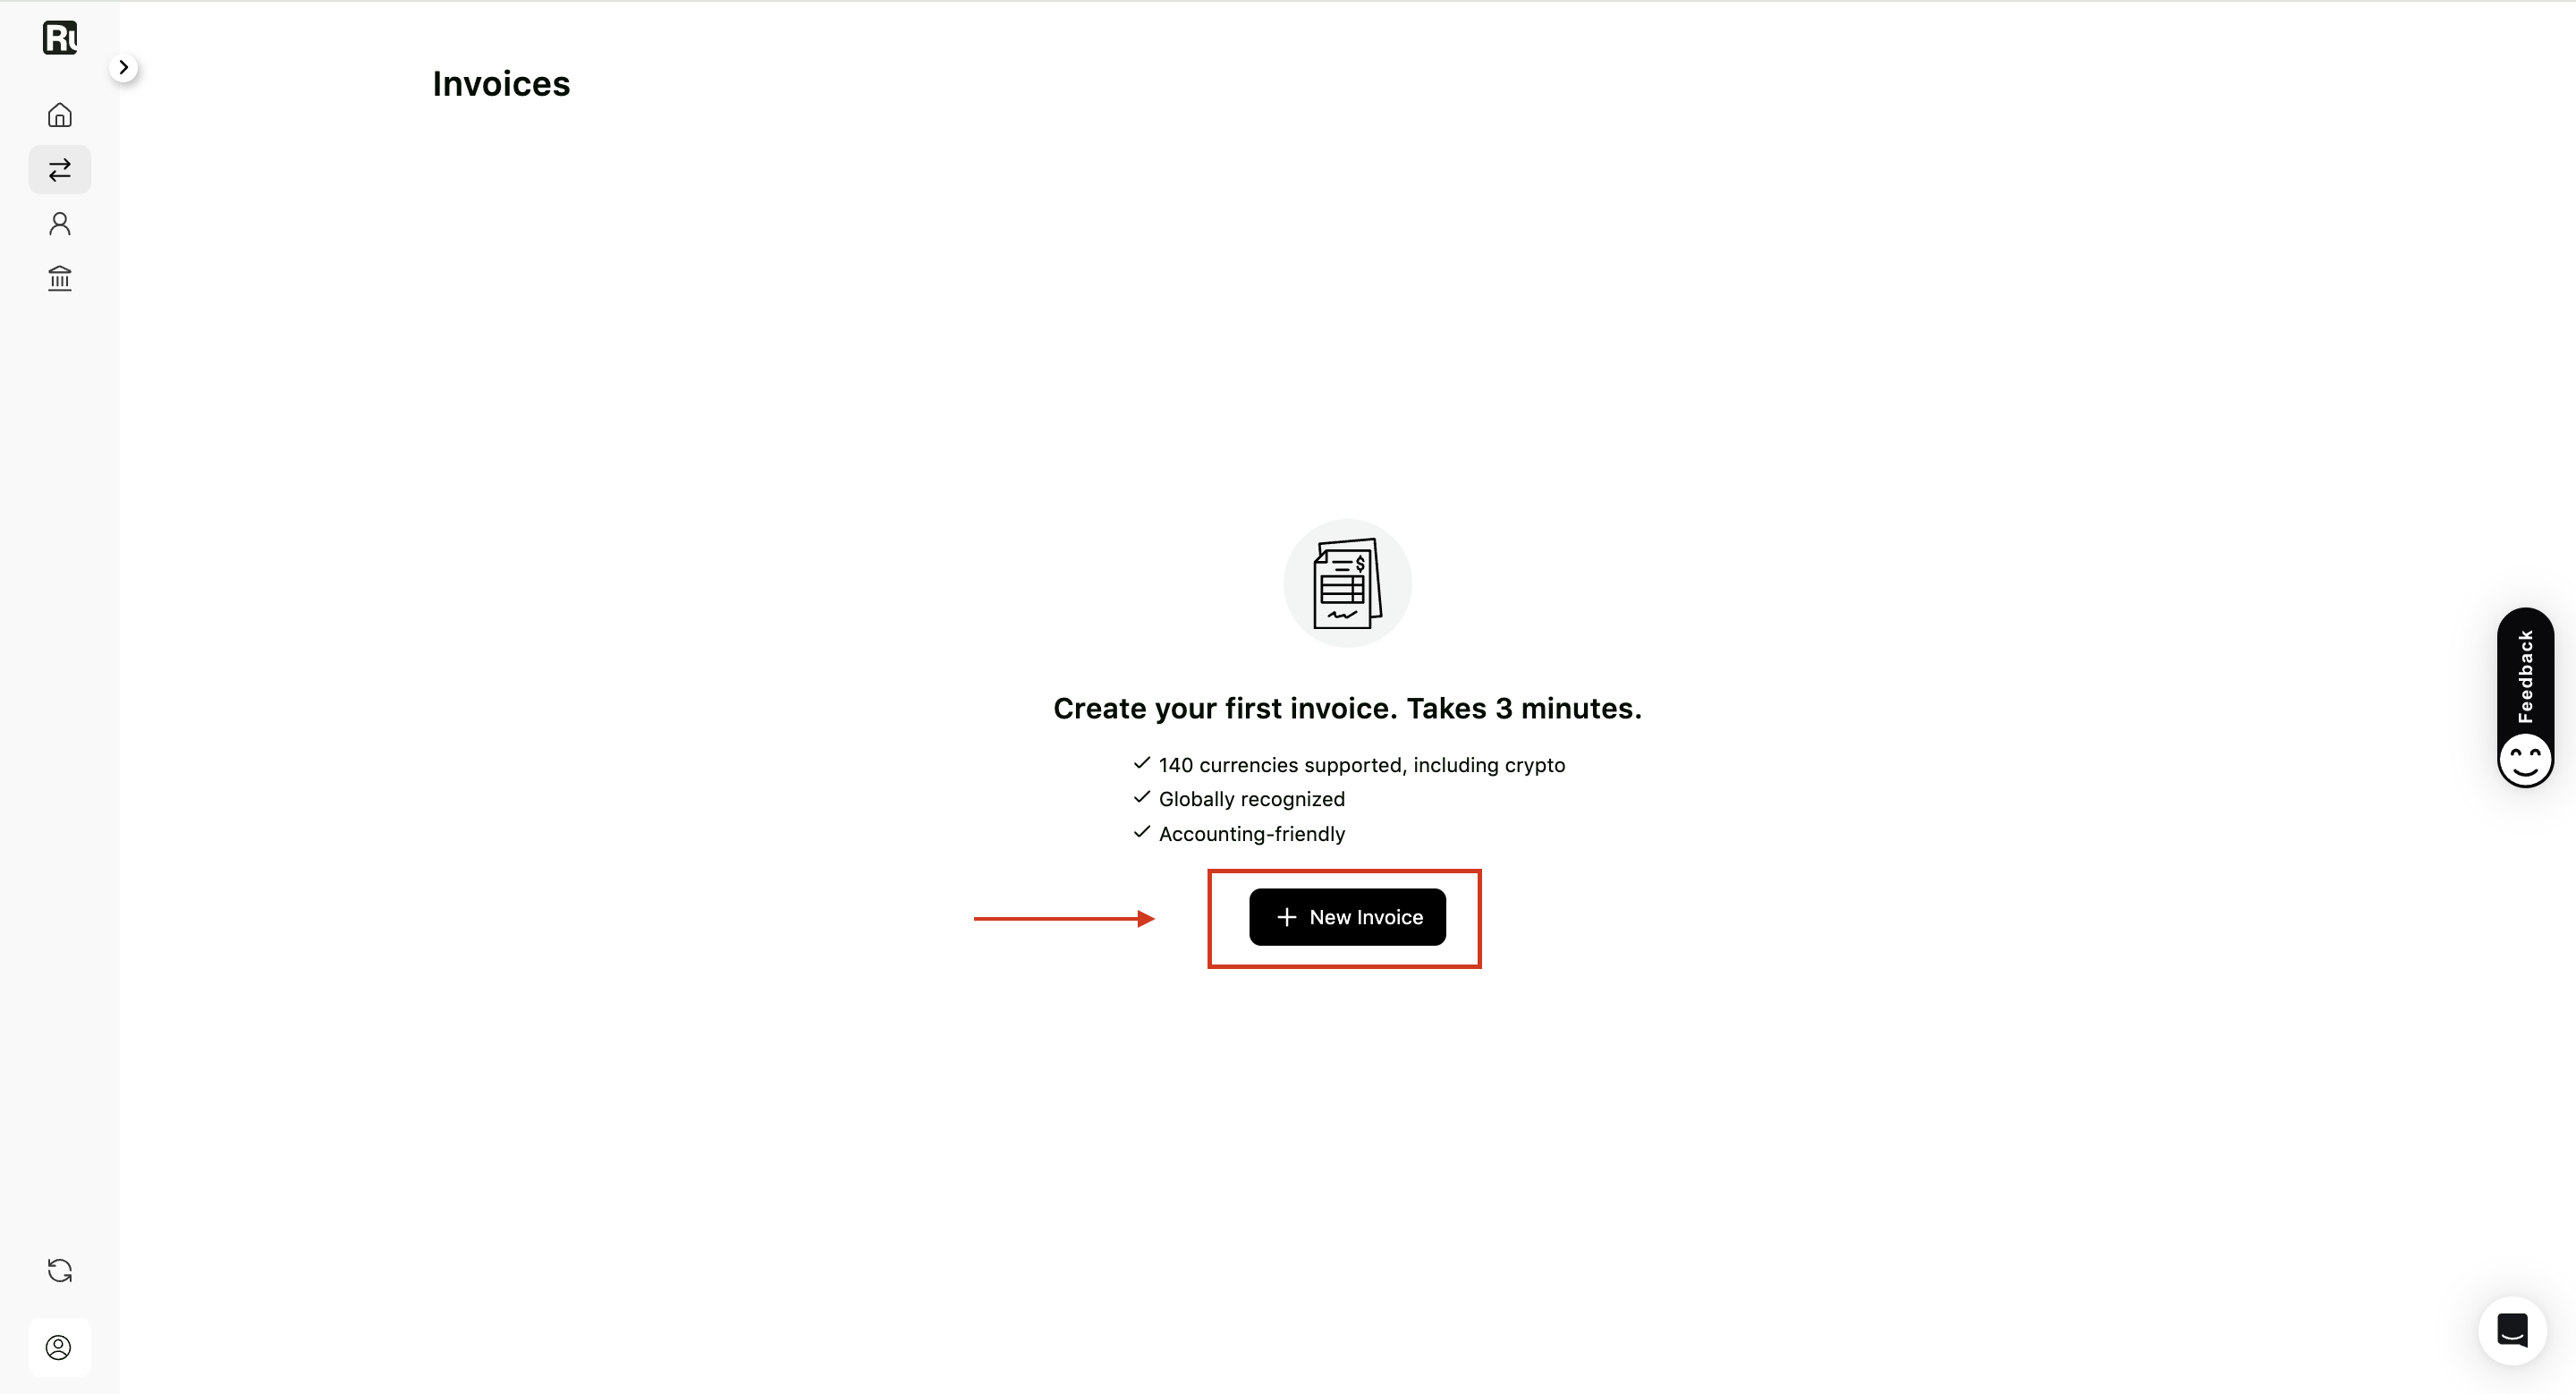
From your dashboard, go to Invoices and click New Invoice.
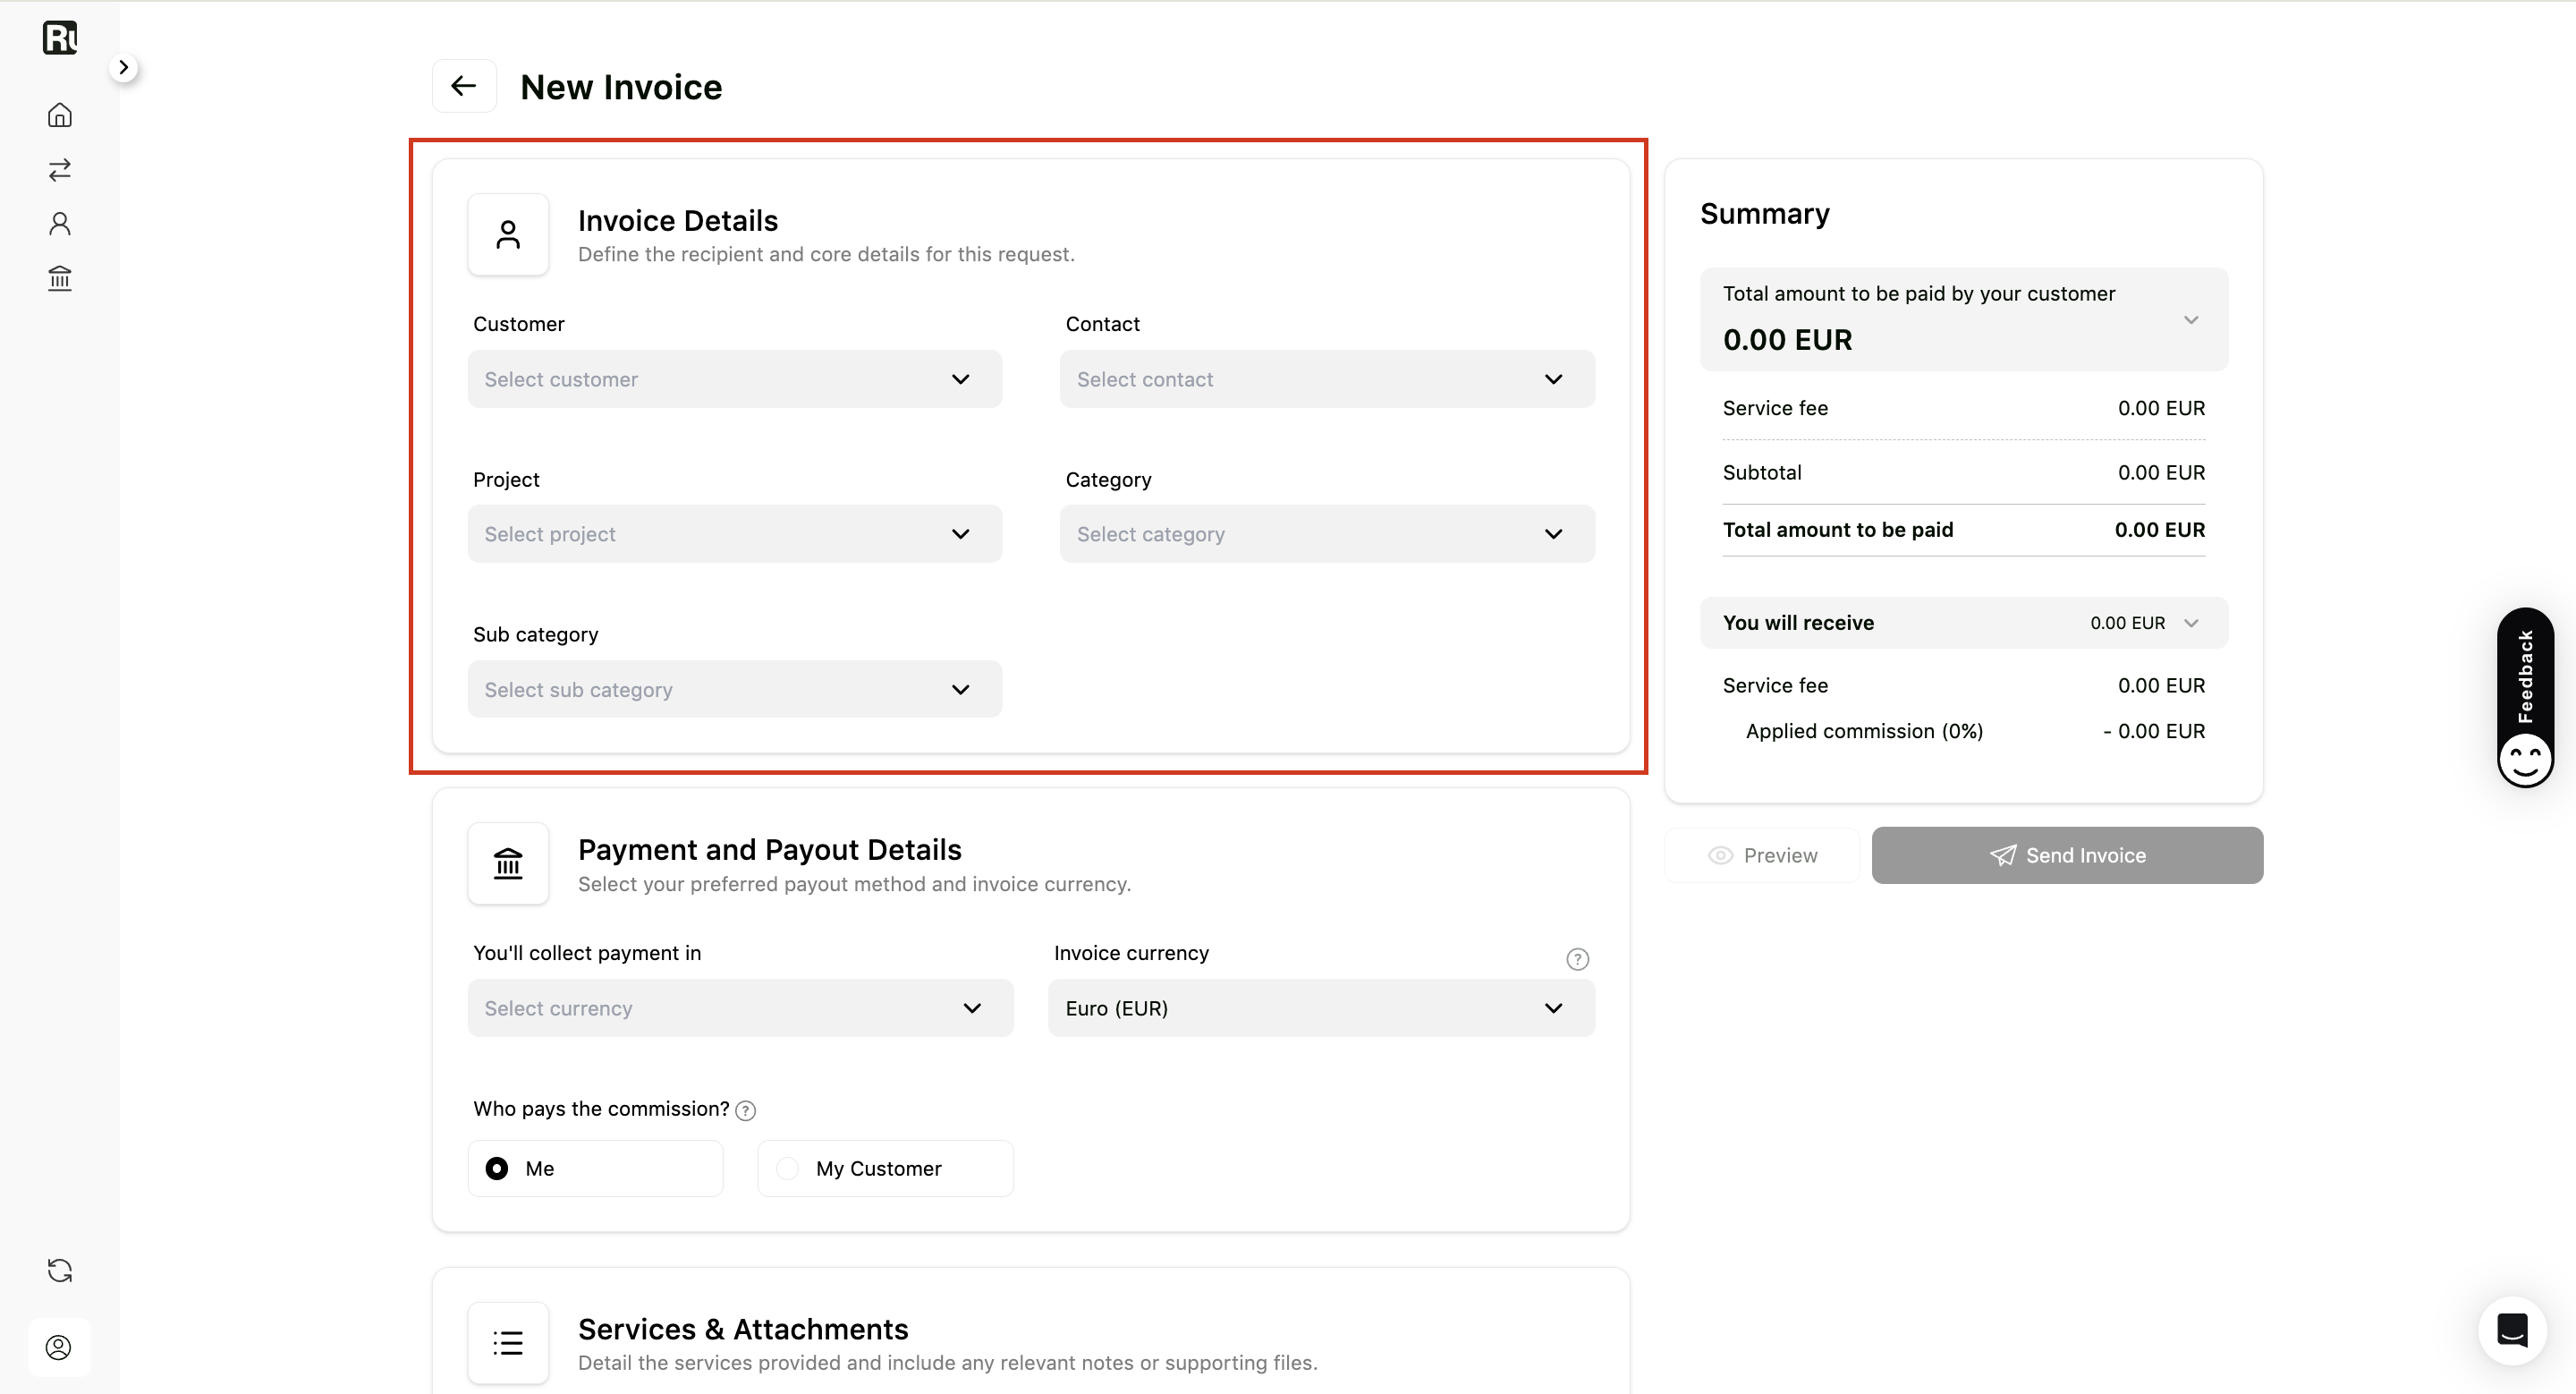
1. Fill in Invoice Details
-
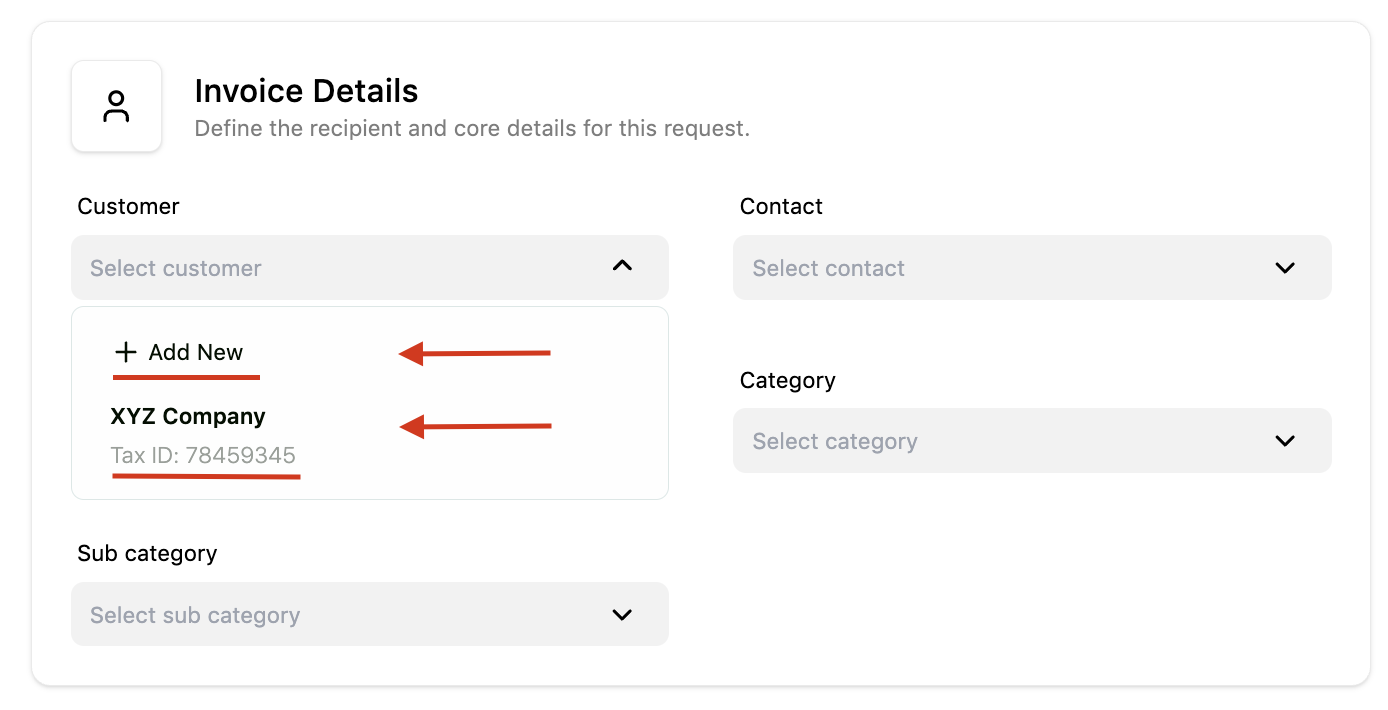
Select or add a customer
Choose an existing customer, or click + Add New to create one.
If you haven’t added any customers yet, see how to add and manage customers.
-
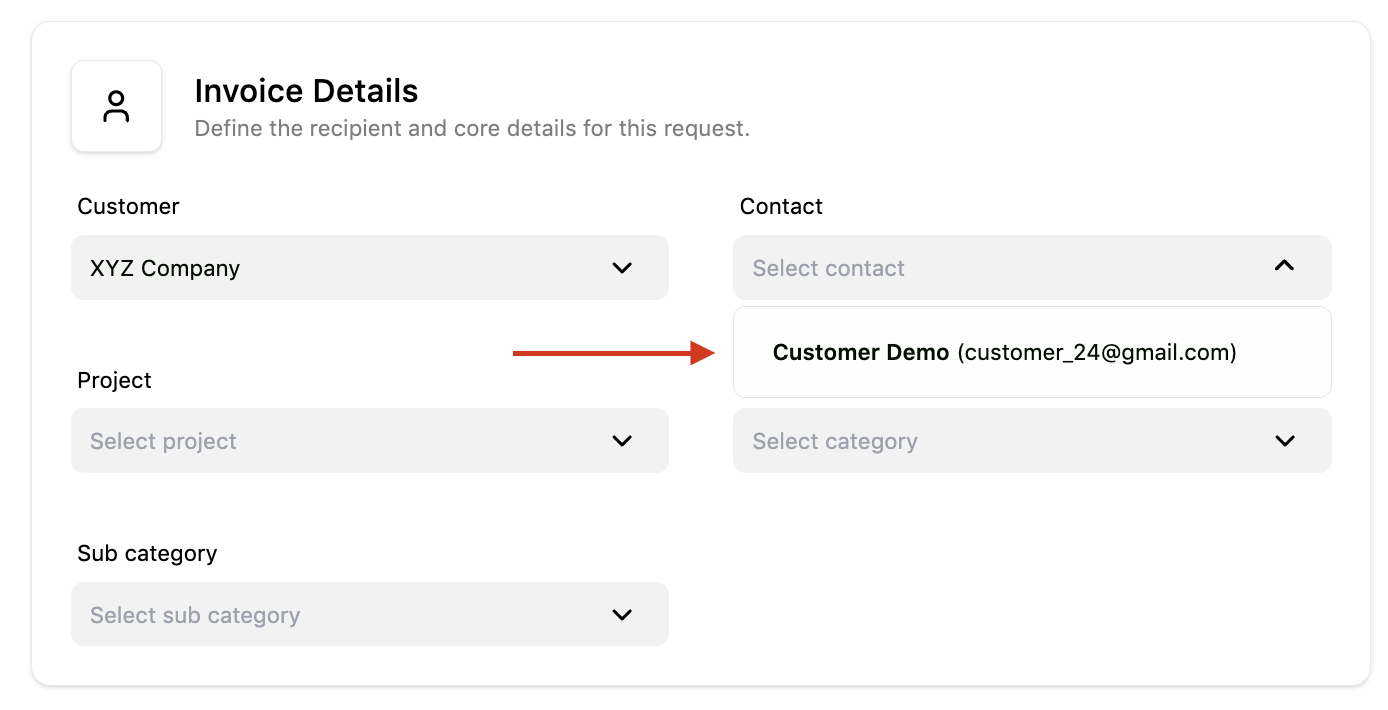
Choose the contact person
Select a contact linked to the customer. The invoice and related emails are sent to this contact.
-
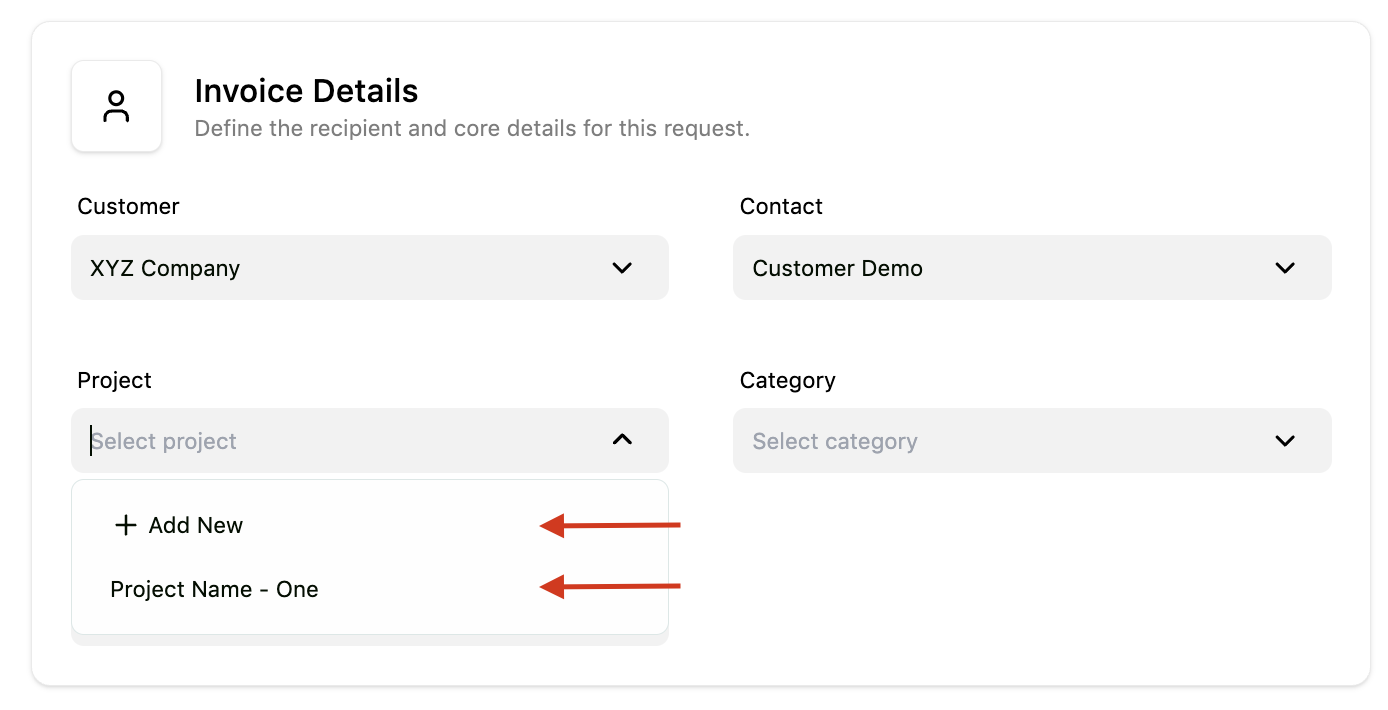
Select the project
Assign the invoice to an existing project or create a new one. This keeps your transactions organized.
-
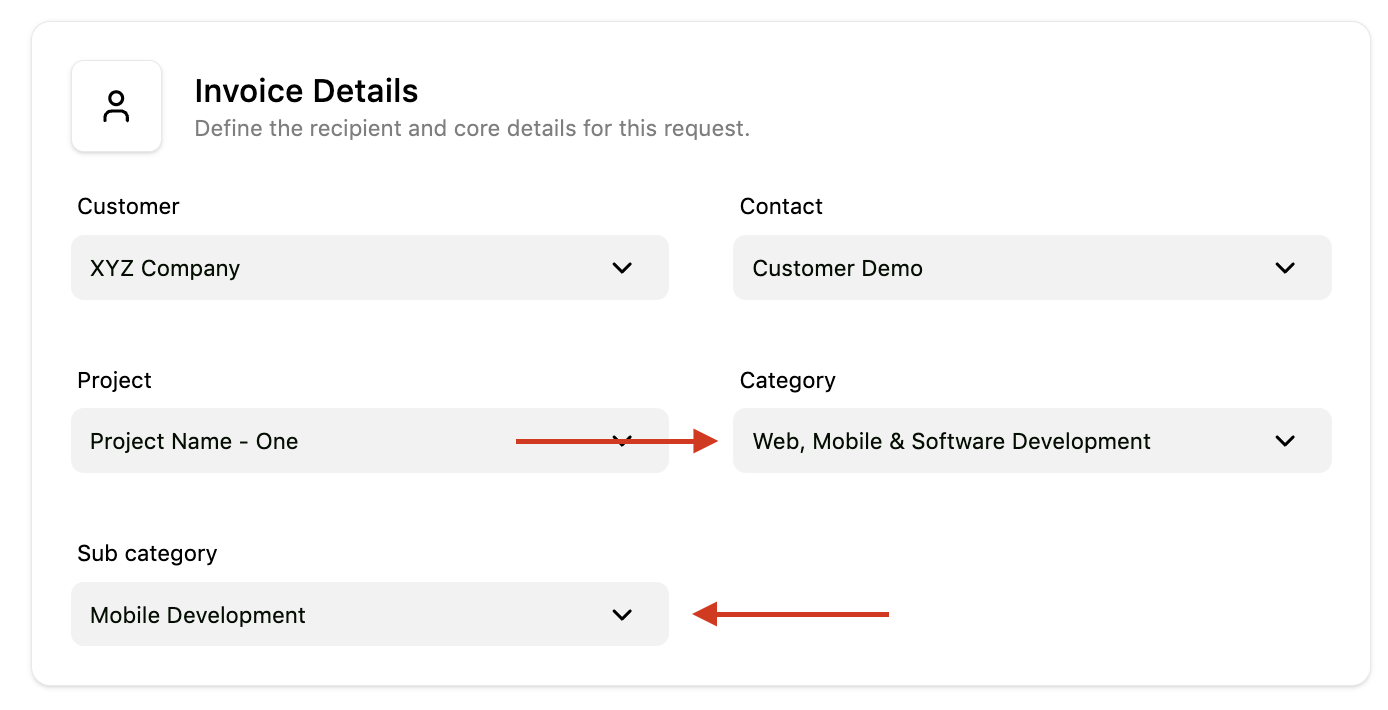
Choose category and subcategory
Select the type of service you’re invoicing for, then use the subcategory to define it more precisely (e.g. Design → 3D Modeling).
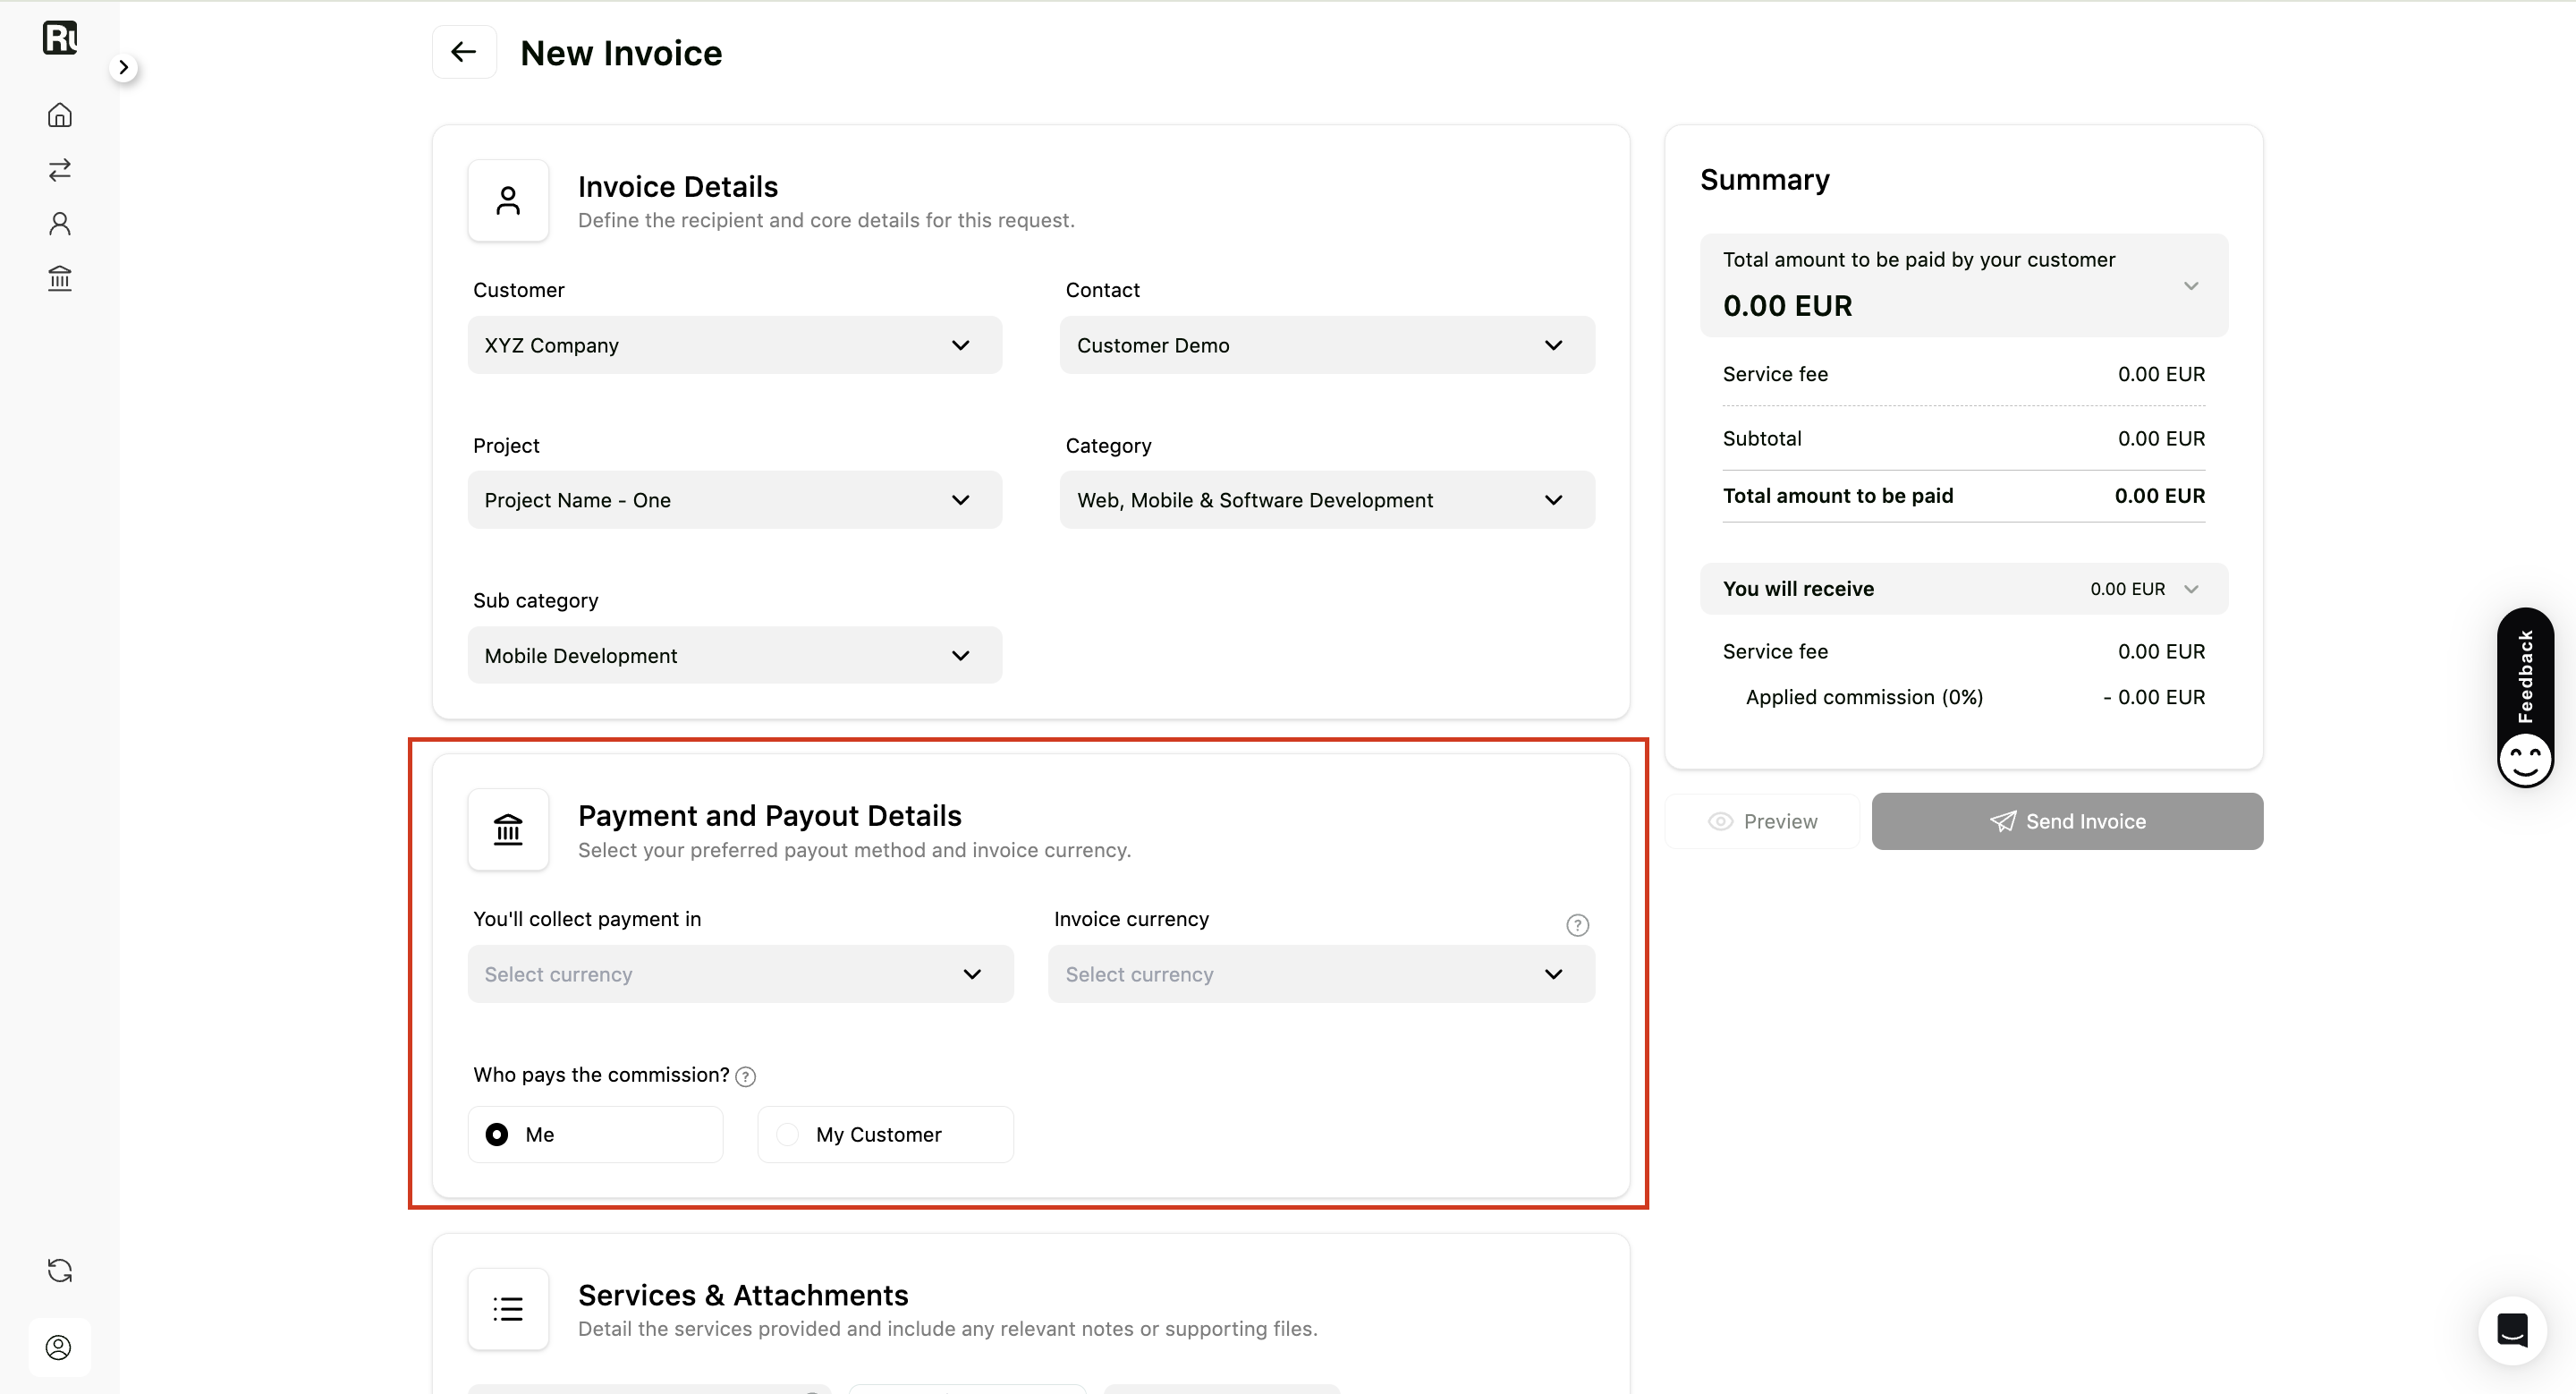
2. Set Payment and Payout Details
-
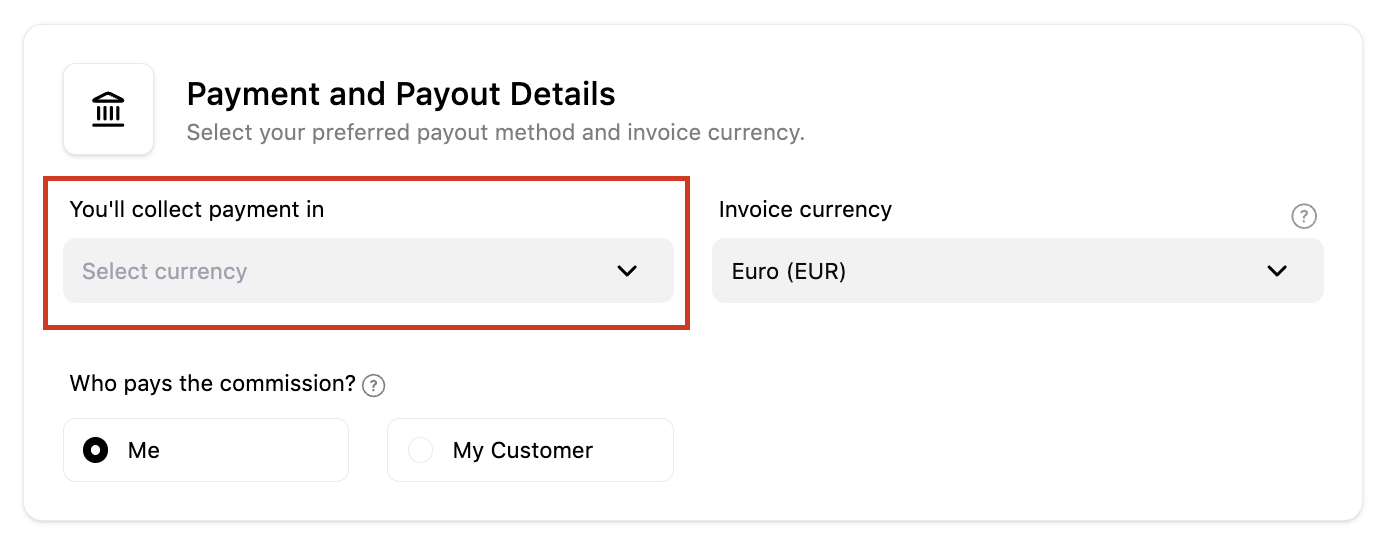
Select payout option (You’ll collect payment in)
Choose a previously added payout option, or click + add a bank account instead.
* This opens the **Add Banking Information** drawer (Bank Account, Binance, Cenoa, MiniPay).
* You don’t need a payout account to create the invoice, but you **will need one to receive the payment**.
* Adding it during invoice creation is the easiest way to avoid delays later. (More on collecting payments on the [get paid](https://ruul.io/get-paid) page.)
Note: The payment collection account is also referred to as the “Payout Option.”
-
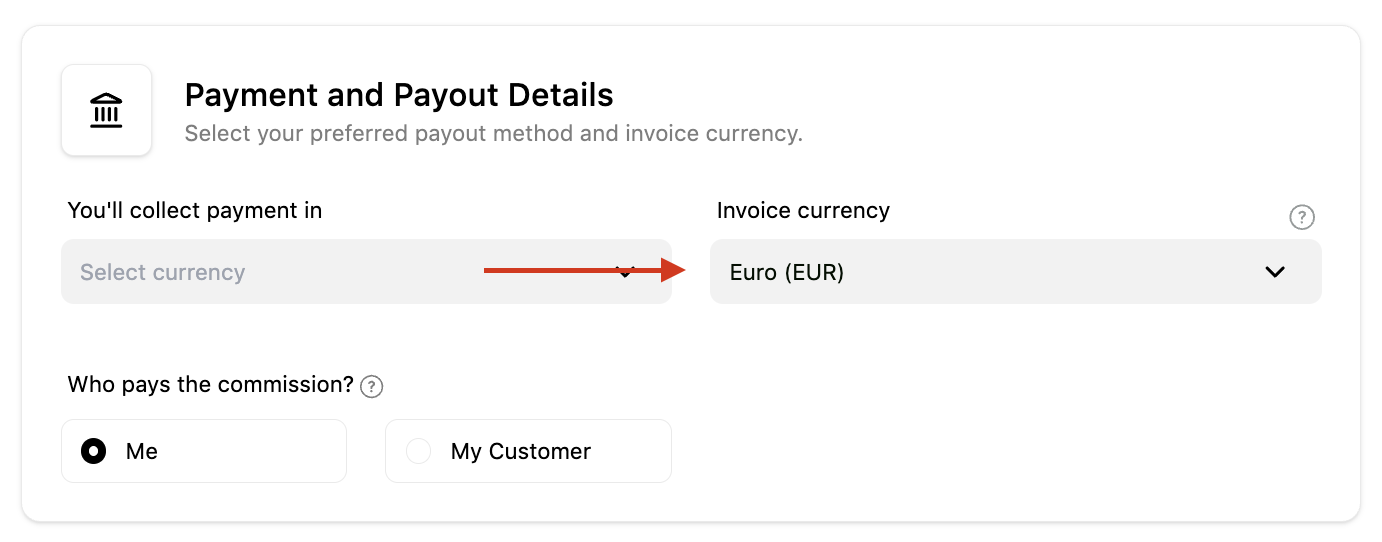
Choose transaction currency
Select the currency your customer will use to pay (e.g. EUR, USD, GBP)
* This is the currency shown on the invoice and used at payment.
* It can differ from your payout currency.
Note: If the payment is made in a different currency from your payout, it’s converted at real-time exchange rates - there’s no separate foreign-exchange fee, and you’ll see the final amounts before you send the invoice.
-
Select the service fee payer
Choose whether Ruul’s commission is paid by you or your customer.
* Whoever you pick covers Ruul’s commission in full.
* The fee can’t be split between the two parties.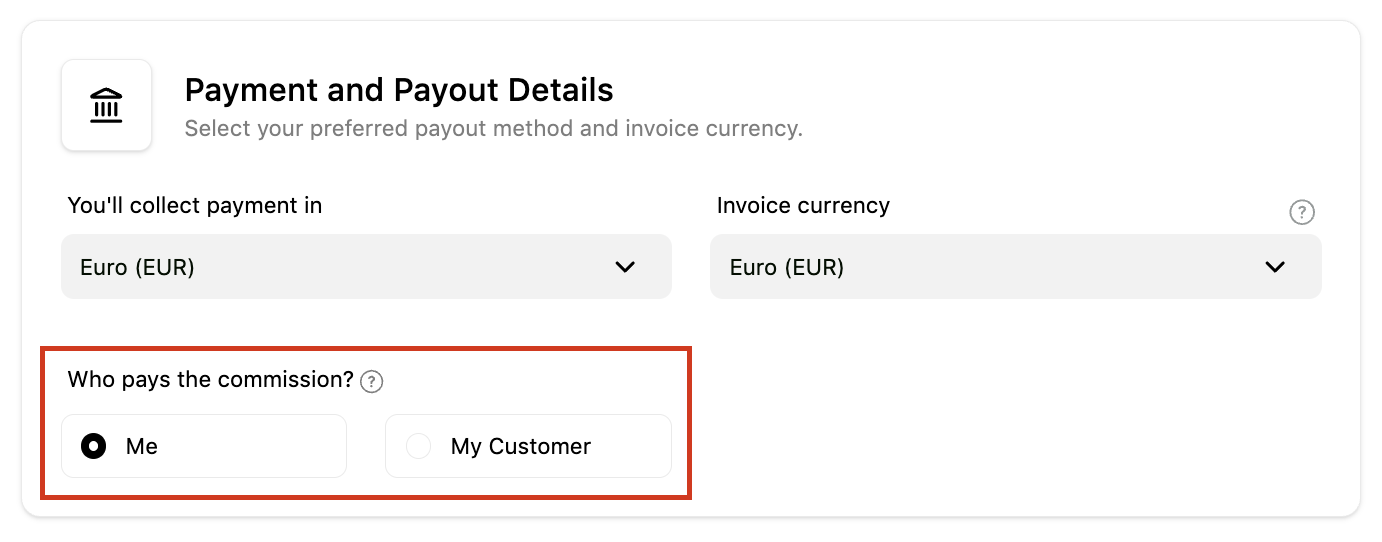
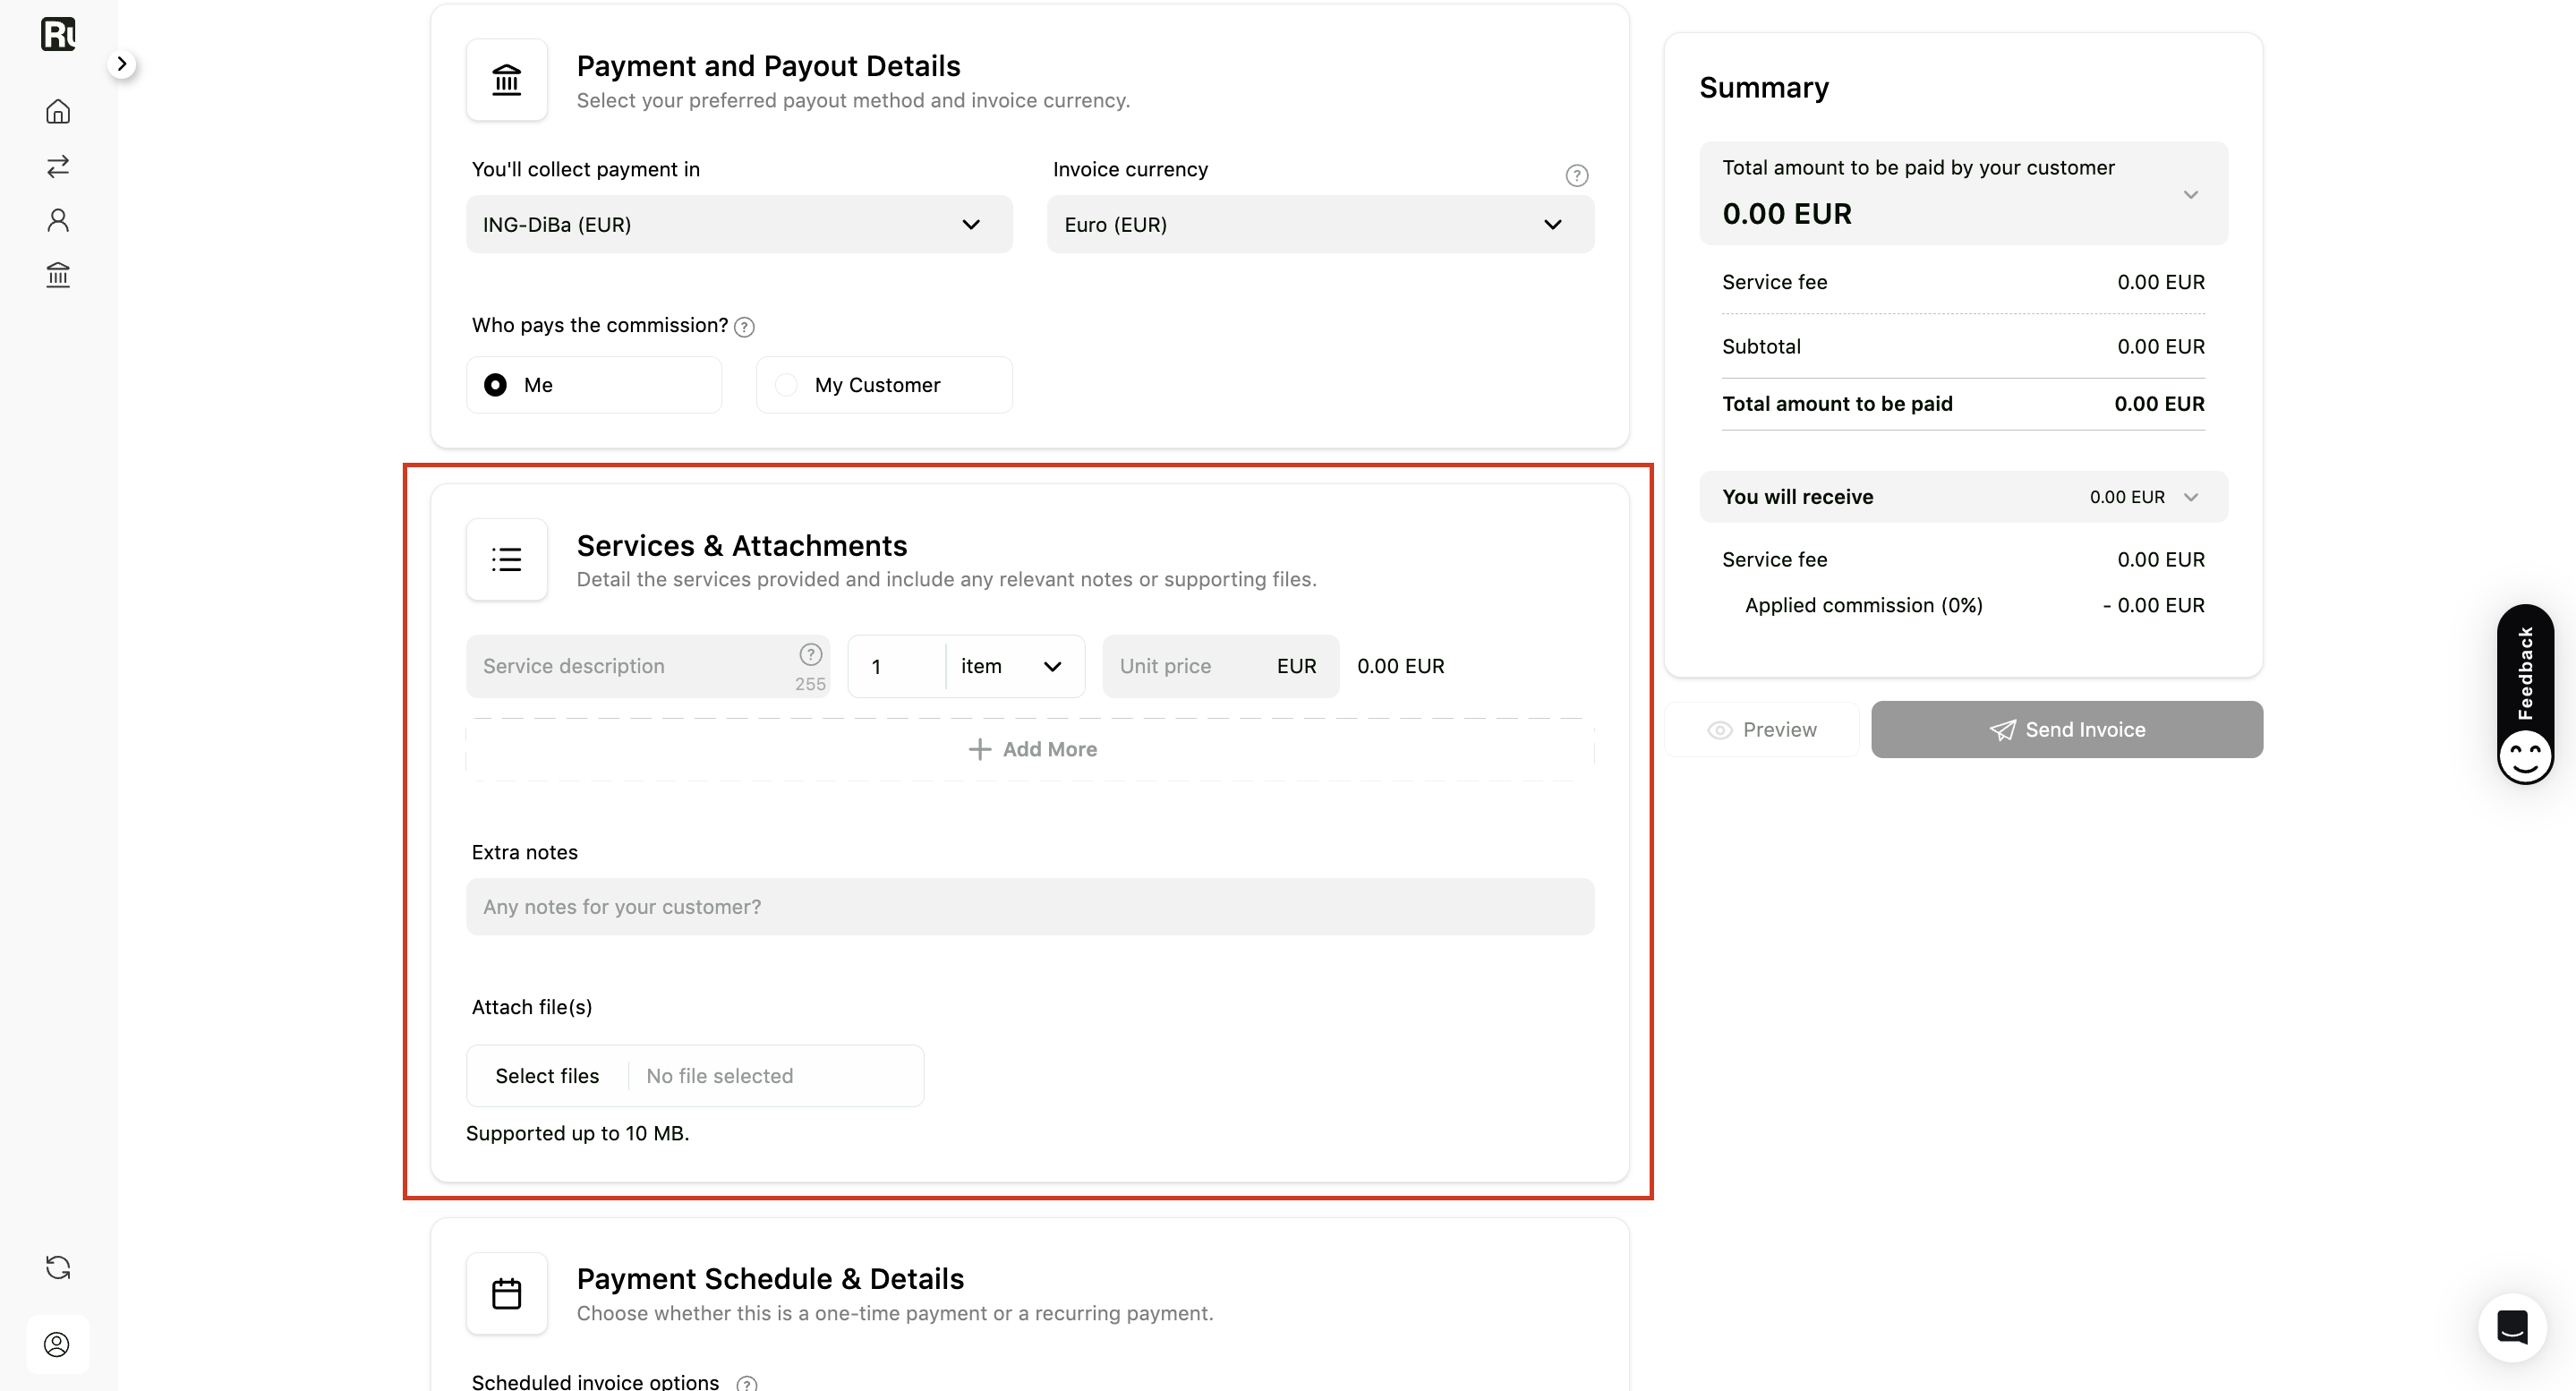
3. Add Services & Attachments
-
Add services
Add a description, quantity, and unit price for each service.
* You can add multiple service items.
* Quantity can be measured in items, hours, days, weeks, or months.
* Ruul automatically calculates both:

	+ The total amount your customer pays
	+ The amount you receive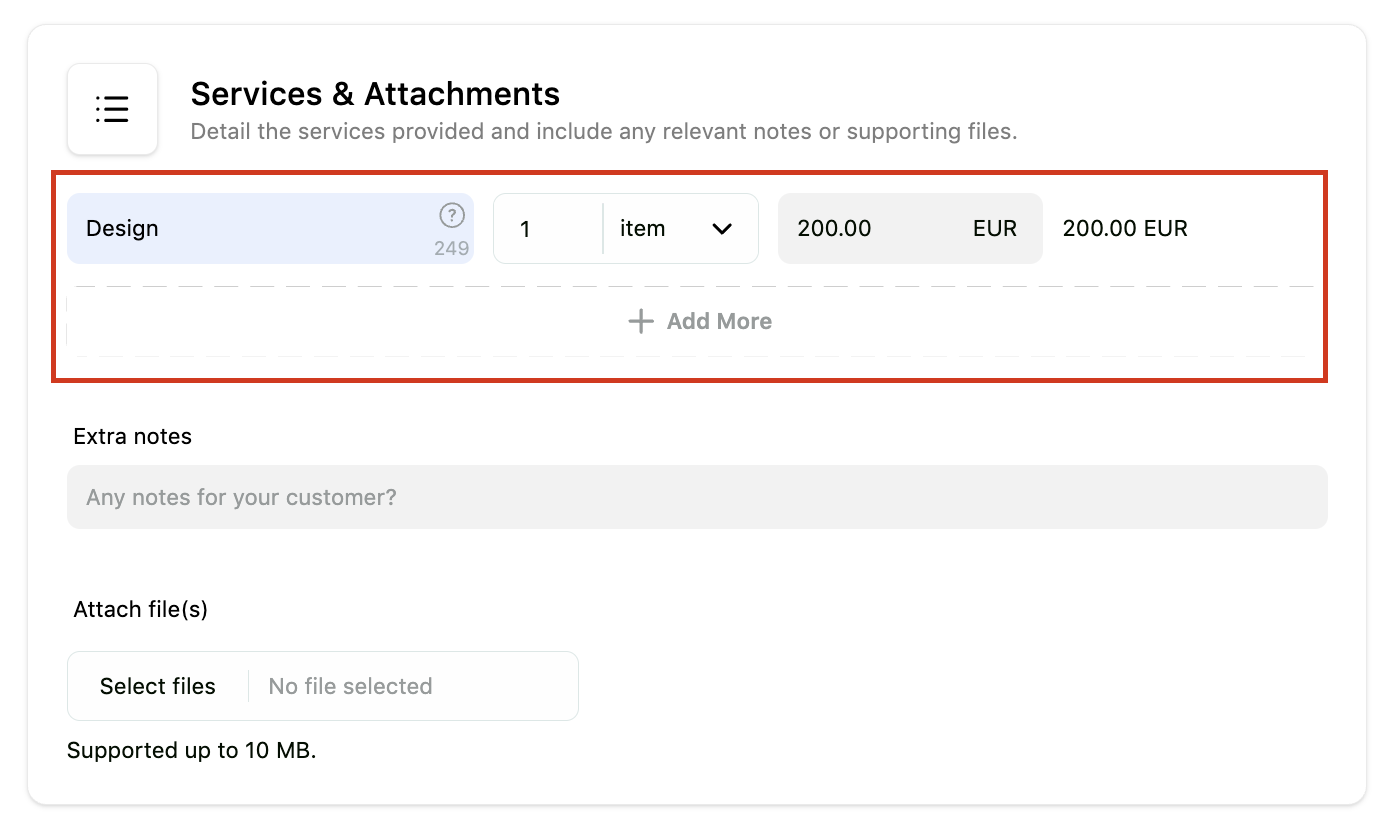
-
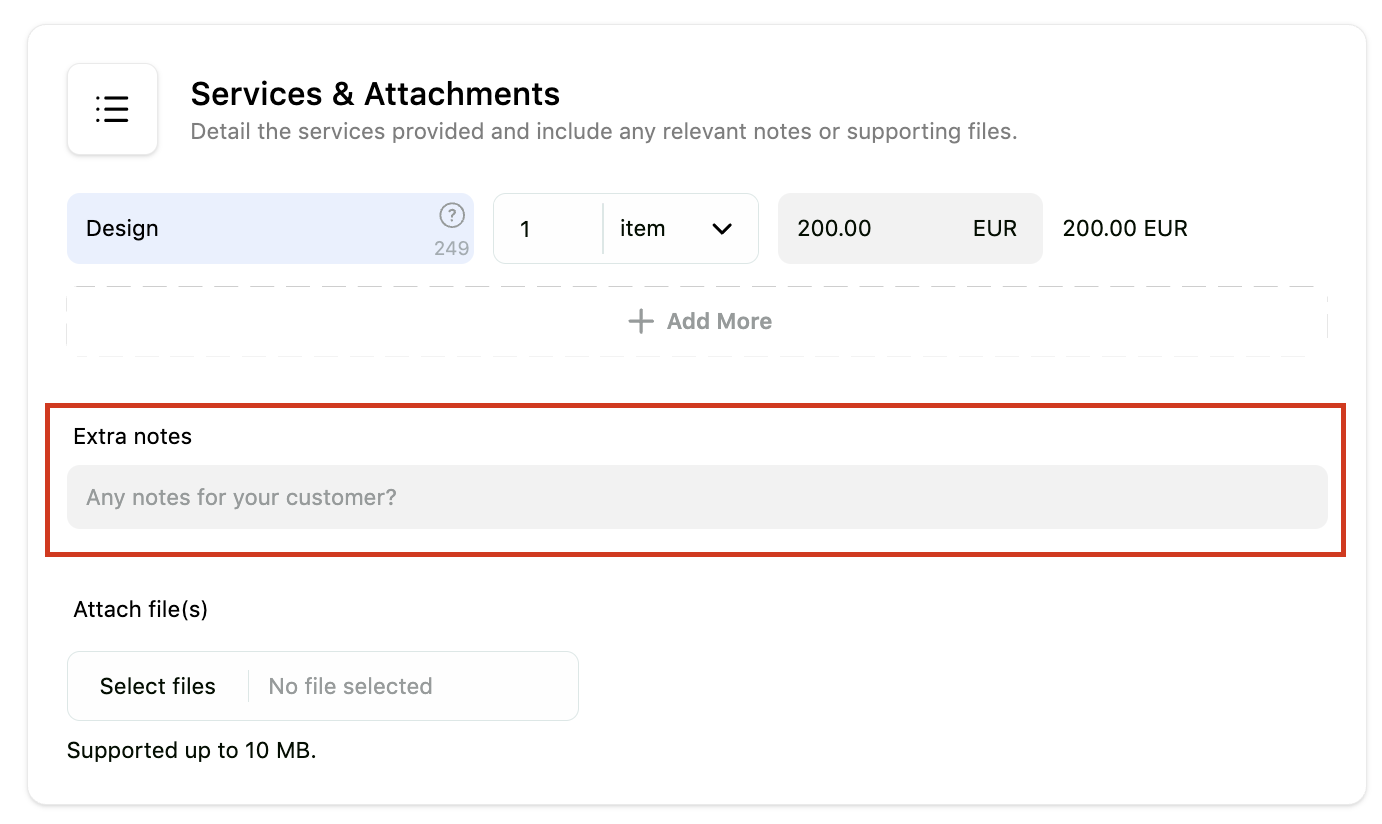
Extra Notes - optional
If there’s anything you’d like to add as a note for your client, you can enter it here. These notes won’t appear on the invoice PDFs, but your client can see them in the invoice details from their dashboard or during guest checkout.
-
Attach file(s) - optional
Supported formats, up to 10 MB.
* You can attach files in the following formats, up to 10 MB:
PDF, DOC, DOCX, XLS, XLSX, PPT, PPTX, TXT, JPG, JPEG, PNG, GIF, BMP, ZIP, RAR.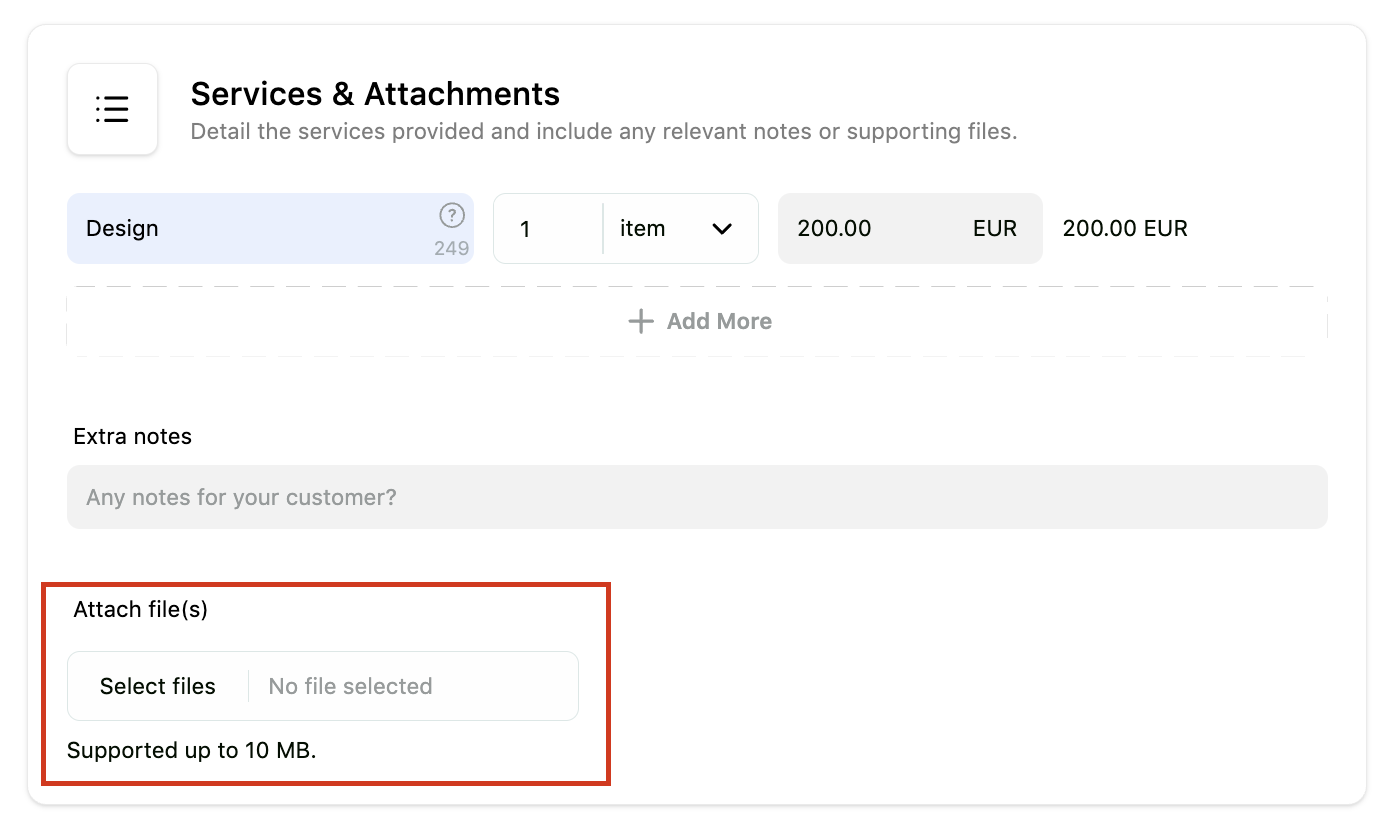
4. Payment Schedule & Details
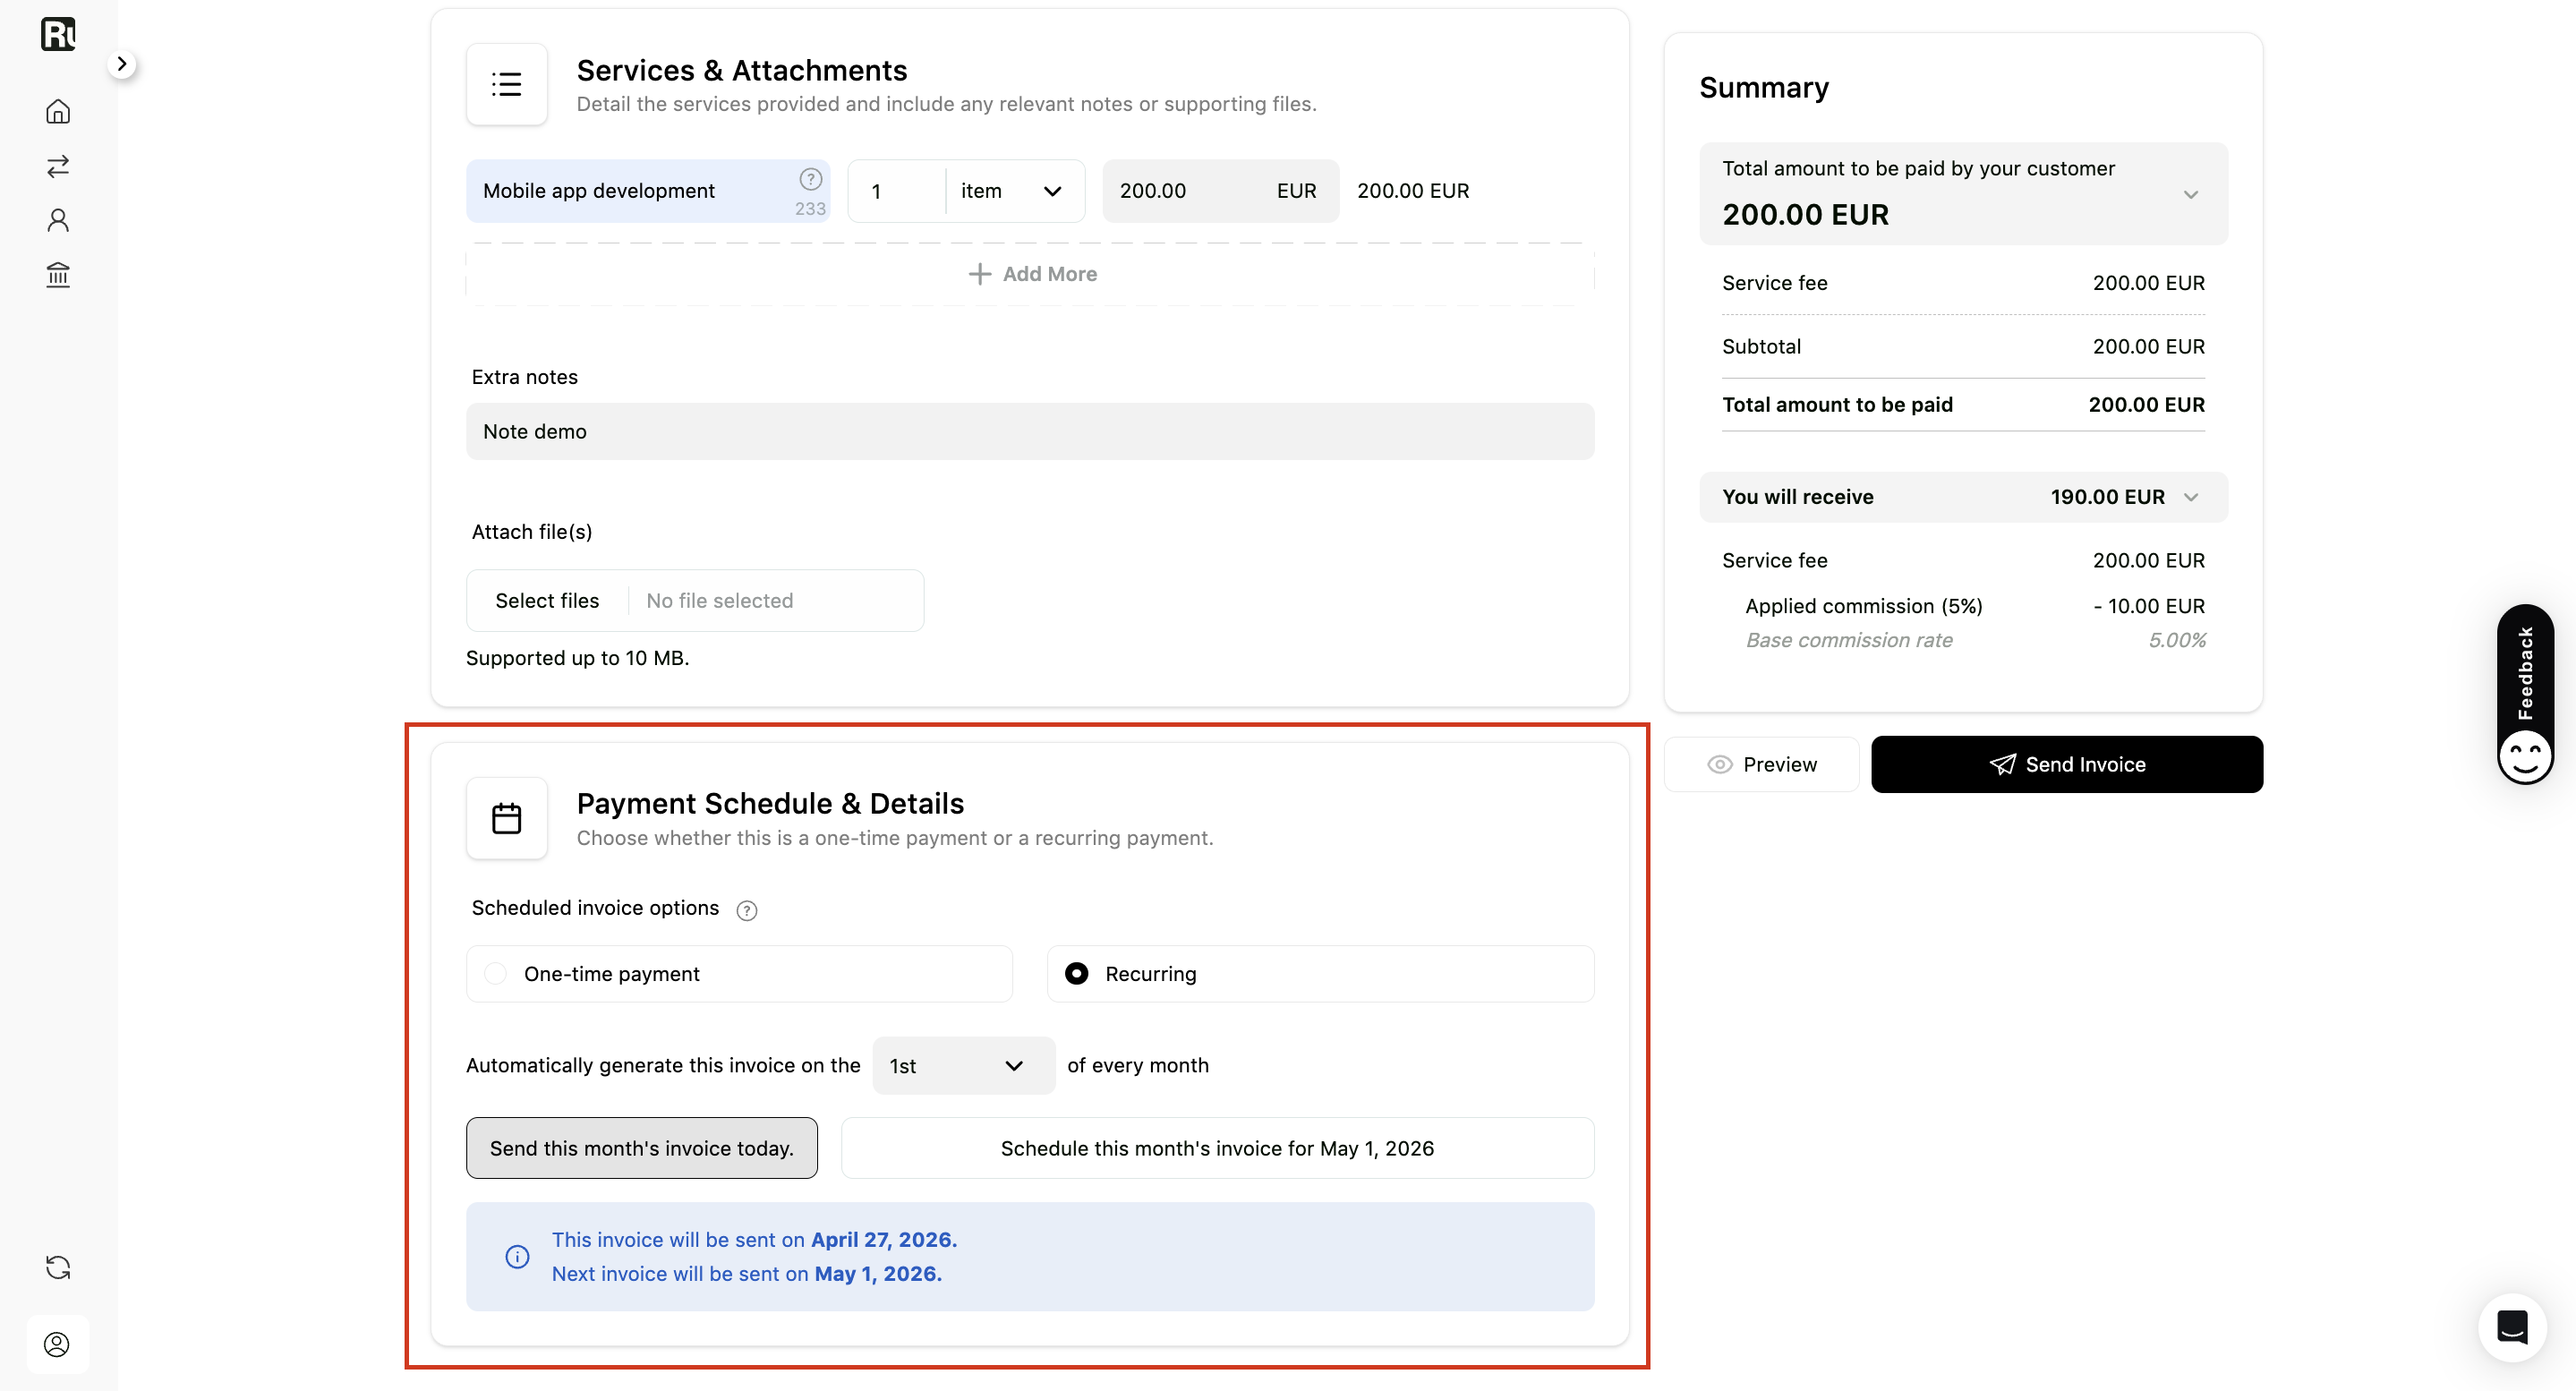
You have the option to send the invoice immediately or set it up as a recurring scheduled invoice.
- Select “Once Only” to send a one-time invoice immediately after you click Send Invoice.
- Select “Automatically generate this invoice on…” to set up a scheduled invoice - Ruul will generate and send this invoice automatically on the chosen date every month. Your client still pays each invoice manually; there is no automatic charge. See how to set up a scheduled invoice for more details.
5. Review the total
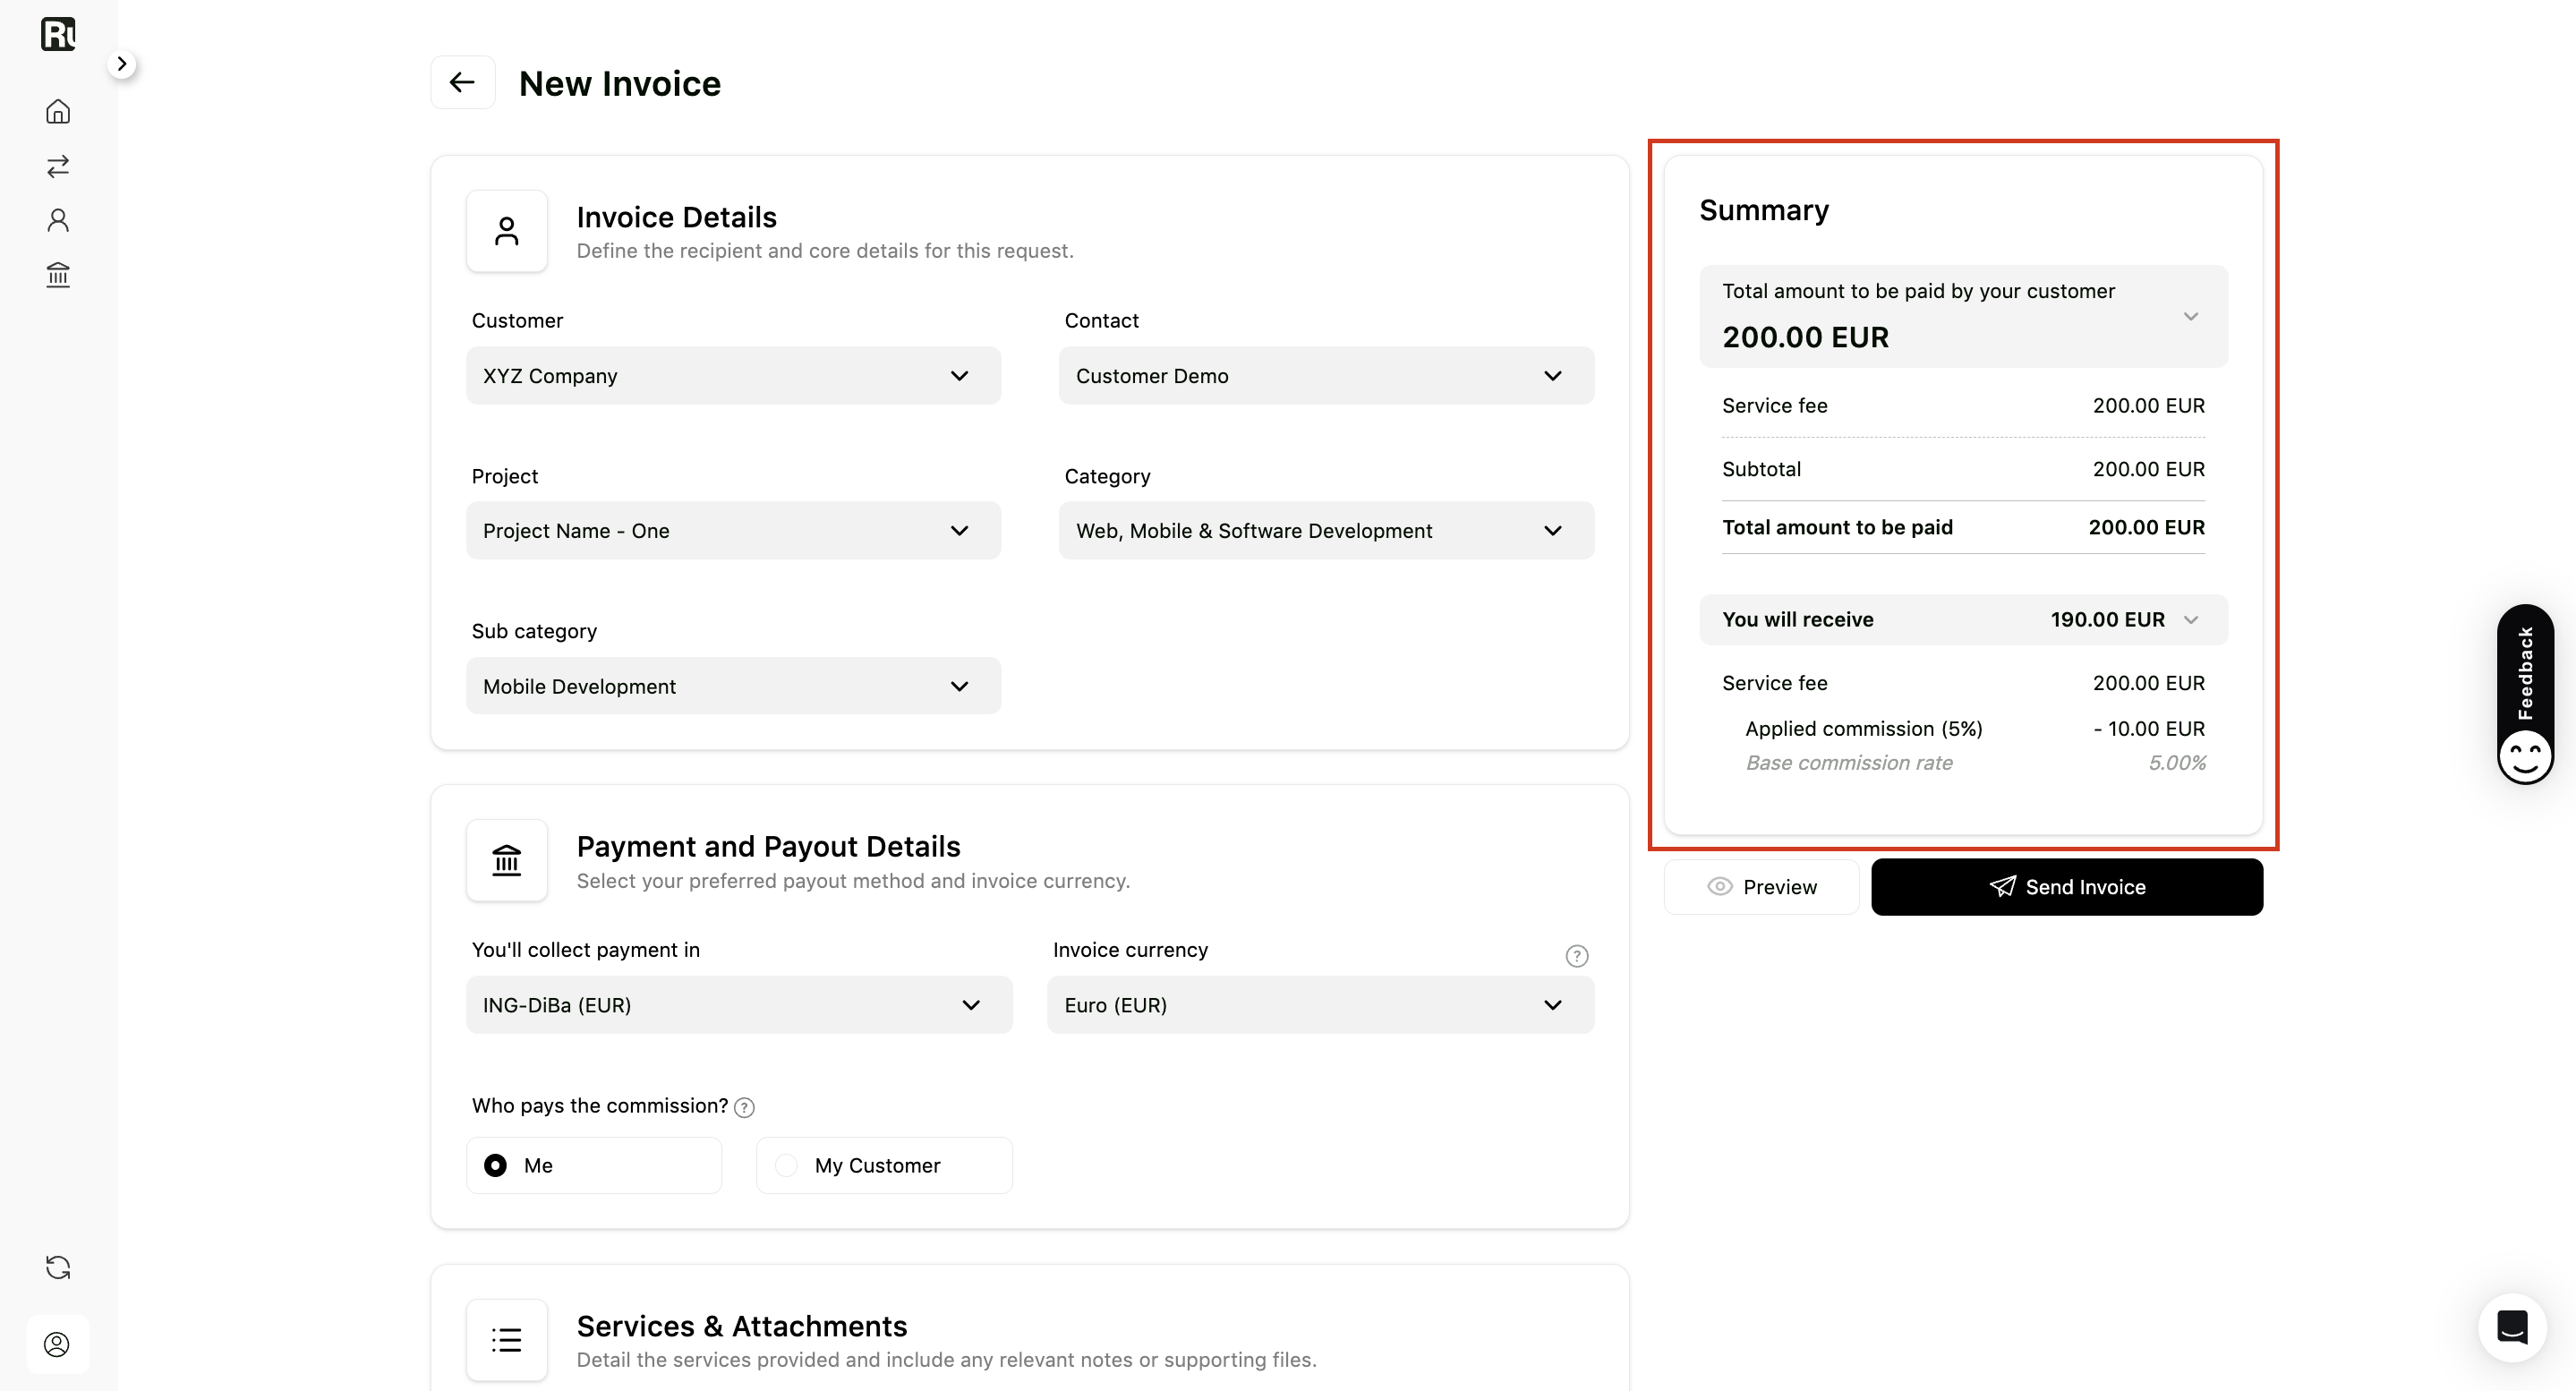
The Summary section updates automatically as you enter details.
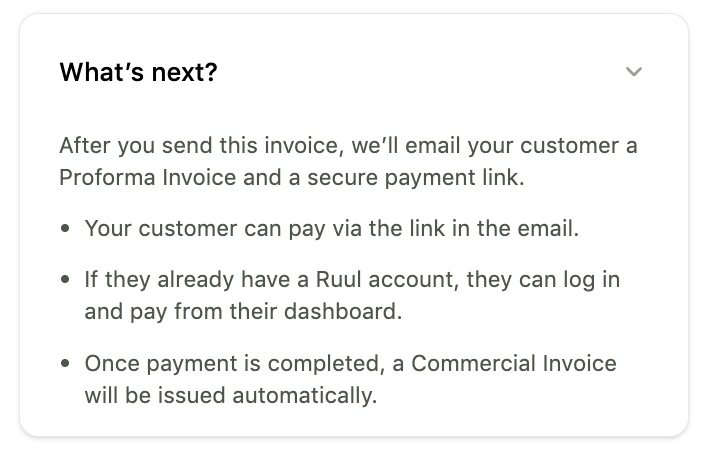
6. Check what happens next
The What’s next? section shows what will happen after you send the invoice:
- Your customer receives a payment link via email
- They can complete the payment using the link
- A commercial invoice is issued after payment
7. Review and send the invoice
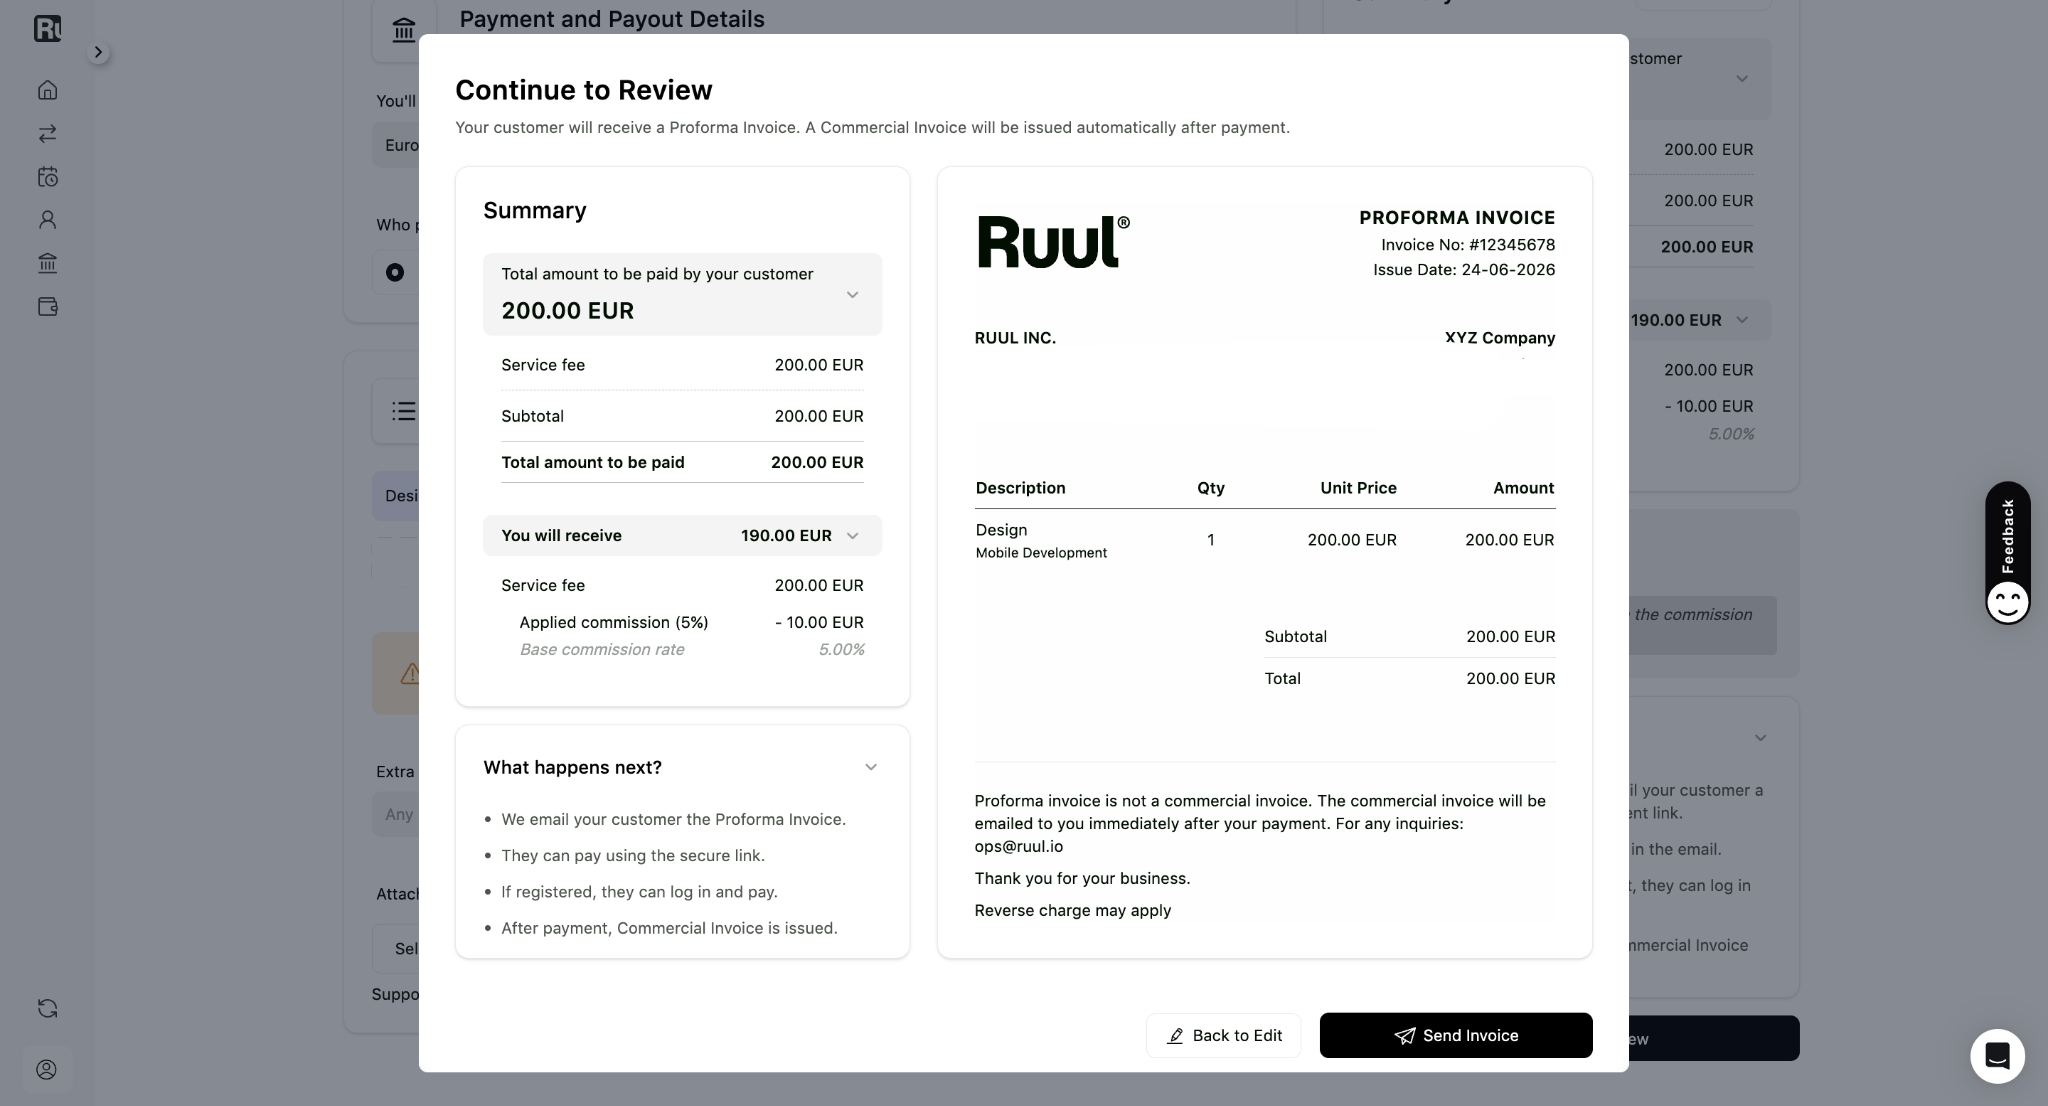
Click Continue to Review to open the review screen.
- Review the invoice details and preview.
- Click Back to Edit if you need to make changes.
- Click Send Invoice when everything looks right.
After sending the invoice
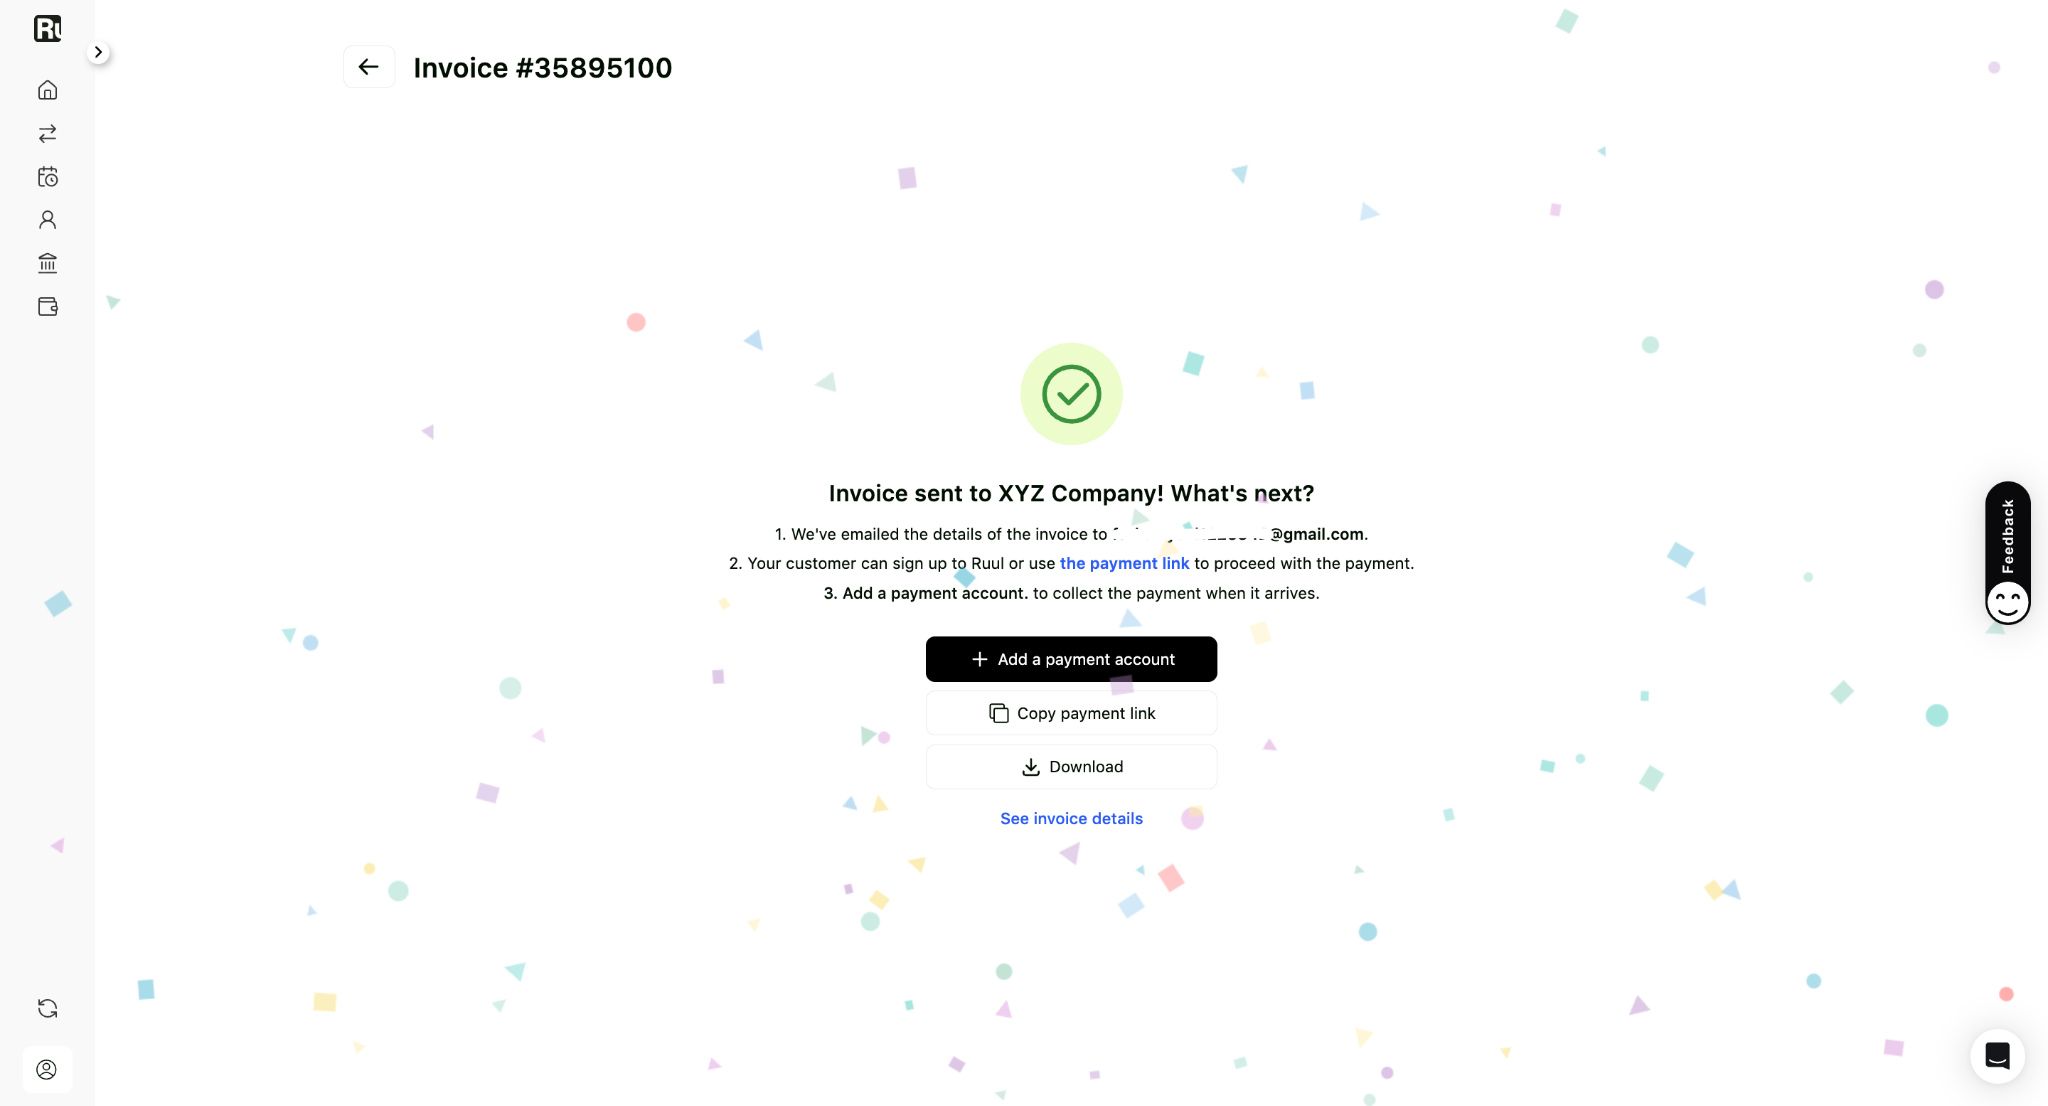
Once the invoice is sent, you can:
- Copy payment link to share with your customer
- Download the invoice
- Add a payment account if you haven’t already
- Go to transaction details
Good to know
- You don’t need a payout account to create an invoice, but you do need one to receive payments - adding it early saves a step later.
- A customer’s email can’t be edited after creation. If it’s wrong, delete and re-add the customer.
- Only digital and knowledge-based services can be invoiced through Ruul - physical goods, expenses, and salaries aren’t supported.
- Fees and totals are calculated for you, so the amounts you and your customer see are always accurate.
- Keep attachments under 10 MB, and use one of the supported file formats listed above.
Frequently asked questions
Do I need a payout account before I can create an invoice?
No. You can create and send the invoice without one, but you'll need a payout account in place to actually receive the payment, so it's best to add one during creation to avoid delays.
Can I split Ruul's service fee with my client?
No. The fee is paid in full either by you or by your customer. You choose the service fee payer while creating the invoice, but it can't be divided between both parties.
Can I edit a customer's email after creating the invoice?
No. The customer email can't be changed once set. If it's wrong, delete and re-add the customer with the correct address.
What can I invoice for through Ruul?
Only digital or knowledge-based services. Physical goods, expenses, and salaries can't be invoiced through Ruul.
Was this article helpful?
Thanks for the feedback! 🙌